


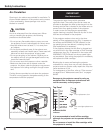

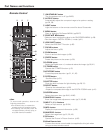
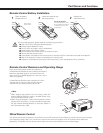
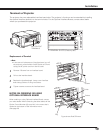
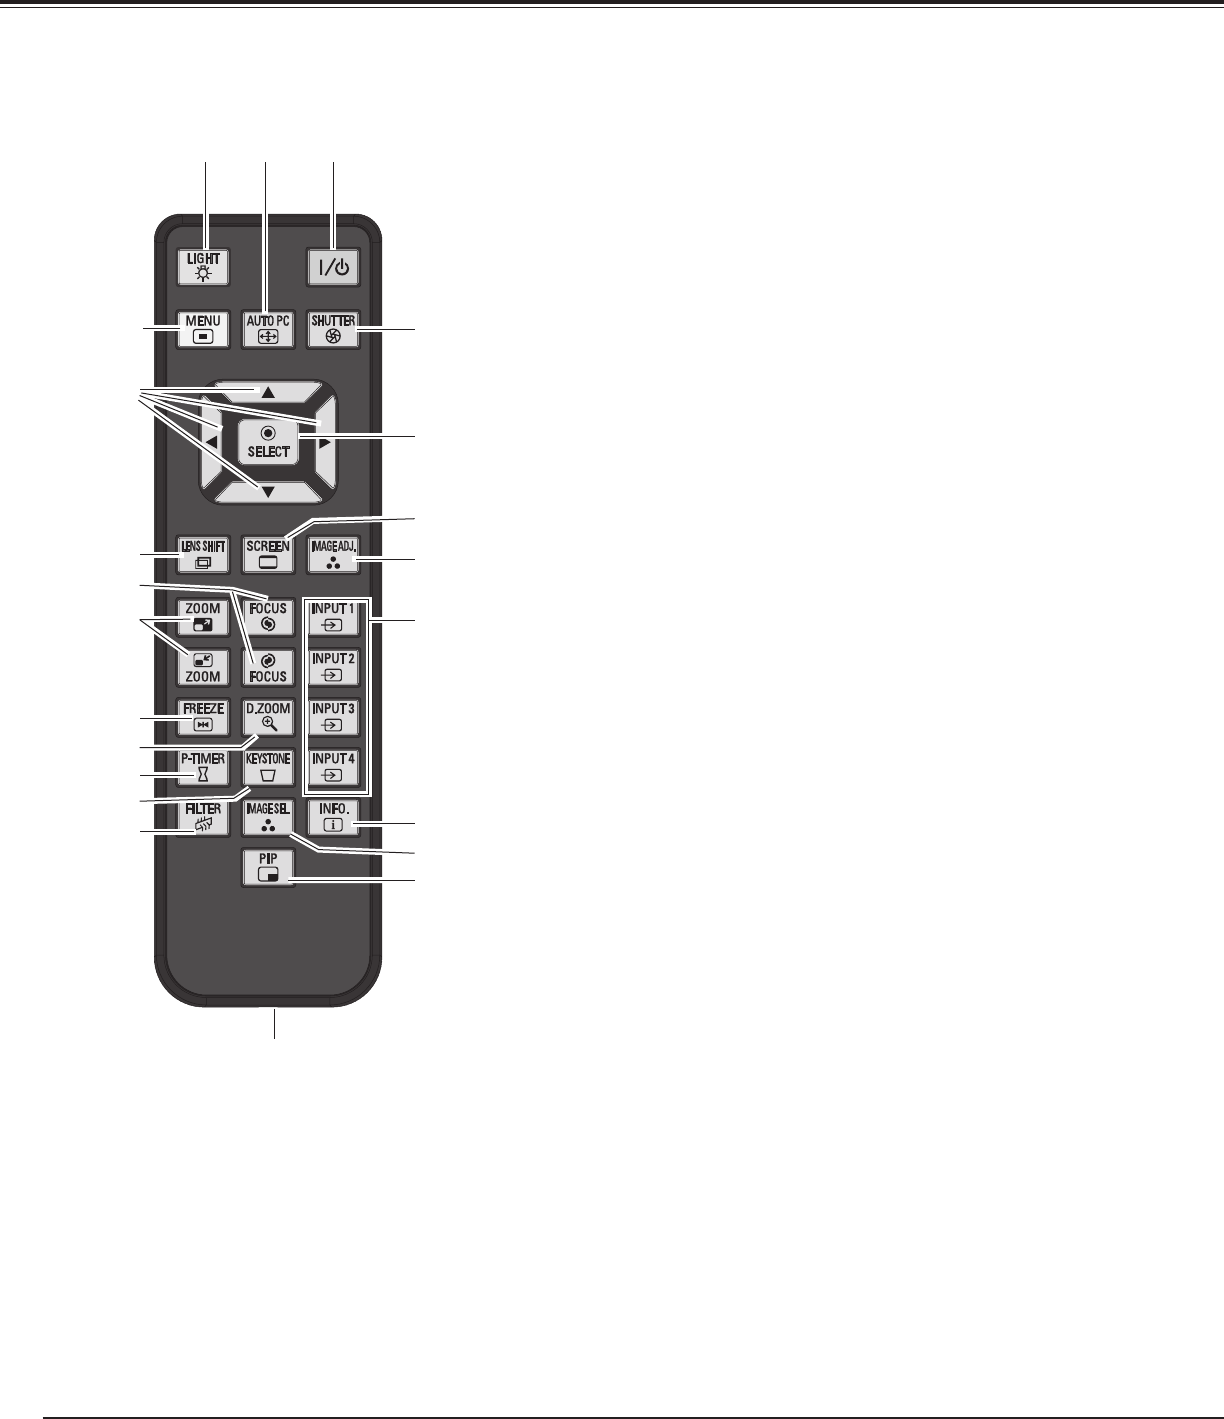
Remote Control
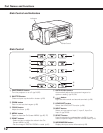
Part Names and Functions
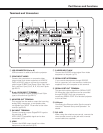
q
t
e
!0
i
!4
r
!3
!1
w
y
o
!7
!2
!8
!9
@0
e
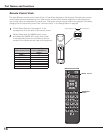
LIGHT button
Light the buttons on the remote control for about 10 seconds.
r
MENU button
Open or close the On-Screen MENU. (pp.26-27)
t POINT ed 7 8 buttons
– Select an item or adjust the value in the ON-SCREEN MENU. (p.26)
–Pan the image in DIGITAL ZOOM +/– mode. (p.41)
y
LENS SHIFT button
Select the LENS SHIFT function. (p.30)
u
FOCUS buttons
Adjust the focus. (p.30)
i
ZOOM buttons
Zoom in and out the images. (p.30)
o
FREEZE button
Freeze the picture on the screen. (p.30)
!1
P-TIMER button
Operate the P-TIMER function. (p.31)
!2
KEYSTONE button
Correct keystone distortion. (pp.31, 41, 45)
q
ON/STAND-BY button
Turn the projector on or off. (pp.24-25)
w
AUTO PC button
Automatically adjust the computer image to its optimum setting.
(pp.30, 36)
!4
SHUTTER button
Close the built-in shutter for light blocking. (pp.28, 31)
!5
SELECT
button
–Execute the selected item. (p.26)
– Expand or compress the image in the DIGITAL ZOOM mode. (p.41)
@2
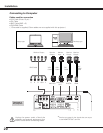
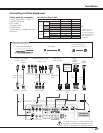
Wired Remote Jack
Connect the
remote control cable (not supplied) to this jack when
using as a wired remote control.
@0
IMAGE SEL. button
Select the image level. (pp.31, 39, 43)
!8
INPUT 1, 2, 3, 4
button
s
Select an input source. (pp.32-34)
!7
IMAGE ADJ. button
Enter the image level adjustment mode. (pp.31, 46-48)
!9 INFO. button
Display the input source information. (p.30)
!6 SCREEN button
Select the screen size. (pp.40-41, 44-45)
!0D.ZOOM
button
Select the Digital zoom +/- mode and resize the image. (pp.30, 41)
14
✔Note:
To ensure safe operation, observe the
following precautions:
• Do not bend, drop, or expose the
remote control to moisture or heat.
• For cleaning, use a soft dry cloth. Do
not apply benzene, thinner, spray, or
any other chemical materials.
!3FILTER button
Scroll the filter. (p.31)
@1
!5
!6
@2
@1
PIP button
Operate the Picture In Picture function. (p.30)
u