


30
Operating with Remote Control
Using the remote control for some frequently used operations is advisable. Just pressing one of the buttons
enables you to make the desired operation quickly without calling up the On-Screen Menu.
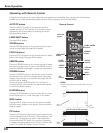
Press the FREEZE button on the remote control to freeze
the picture on the screen. To cancel the FREEZE function,
press the FREEZE button again or press any other button.
FREEZE button
Press the AUTO PC button on the remote control to
operate the Auto PC Adj. function. The computer screen
adjustment can be done easily by pressing this button.
See page 36 for details.
AUTO PC button
Press the D.ZOOM button on the remote control to enter
to the Digital zoom +/– mode. See page 41 for details.
D.ZOOM button
Press the SCREEN button on the remote control to select
the desired screen size. The selected screen size mode
appears on the screen for 4 seconds. See pages 40 to 41
and 44 to 45 for details.
Press and hold the SCREEN button for more than 5
seconds to return all the screen size adjustment setting
to the factory default setting.
SCREEN button
Press the ZOOM buttons on the remote control to zoom
in and out the image. See page 28 for details.
ZOOM buttons
Press the FOCUS buttons on the remote control to adjust
focus of the image. See page 28 for details.
FOCUS buttons
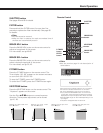
See page 28 for details.
LENS SHIFT button
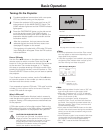
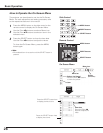
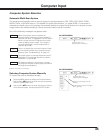
Remote Control
D.ZOOM
button
INFO.
button
POINT ed7 8
buttons
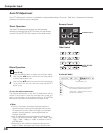
FREEZE
button
AUTO PC
button
SCREEN
button
ZOOM
buttons
FOCUS
buttons
✔Note:
•See the next page for the description of other
buttons.
Press the INFO. button on the remote control to display
the information window on the screen. See the previous
page for details.
INFO. button
Basic Operation
LENS SHIFT
button
PIP
button
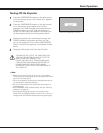
Press the PIP button on the remote control several times
until the desired mode of Picture in Picture appears. Each
mode (User 1-5) appears only when it has stored data.
Press and hold the PIP button for more than 3 seconds
to display the setting dialog box of Picture in Picture. See
page 51 for details of Picture in Picture function.
PIP button
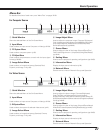
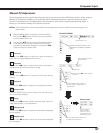
User 1 mode of PIP (example)
Main
picture
Sub
picture
Main
picture
User 2 mode of PIP (example)
Sub
picture