


TRANSMISSION AND RECEPTION USING THE POLLING FUNCTION
3-15
3
USING POLLING MEMORY
This function sends a document previously scanned into memory to a receiving machine when the receiving machine calls
and polls your machine. (If desired, you can restrict polling to fax machines whose fax number you have programmed in your
machine. (See "Polling security setting" on page 8-10.) This machine has "memory box", which is memory used for such
functions as the normal polling memory function, F-code polling memory, F-code confidential transmission, and F-code relay
transmission (refer to page 4-2). The polling memory function explained here uses a memory box called the "PUBLIC BOX".
Scanning a document into memory (Public Box) for polling memory
This procedure is for scanning a document into the Public Box. If other document data has already been stored in the
Public Box, the new document will be added after that data. If the previously stored data is no longer needed, delete that
data (refer to the following page) before scanning a new document data.
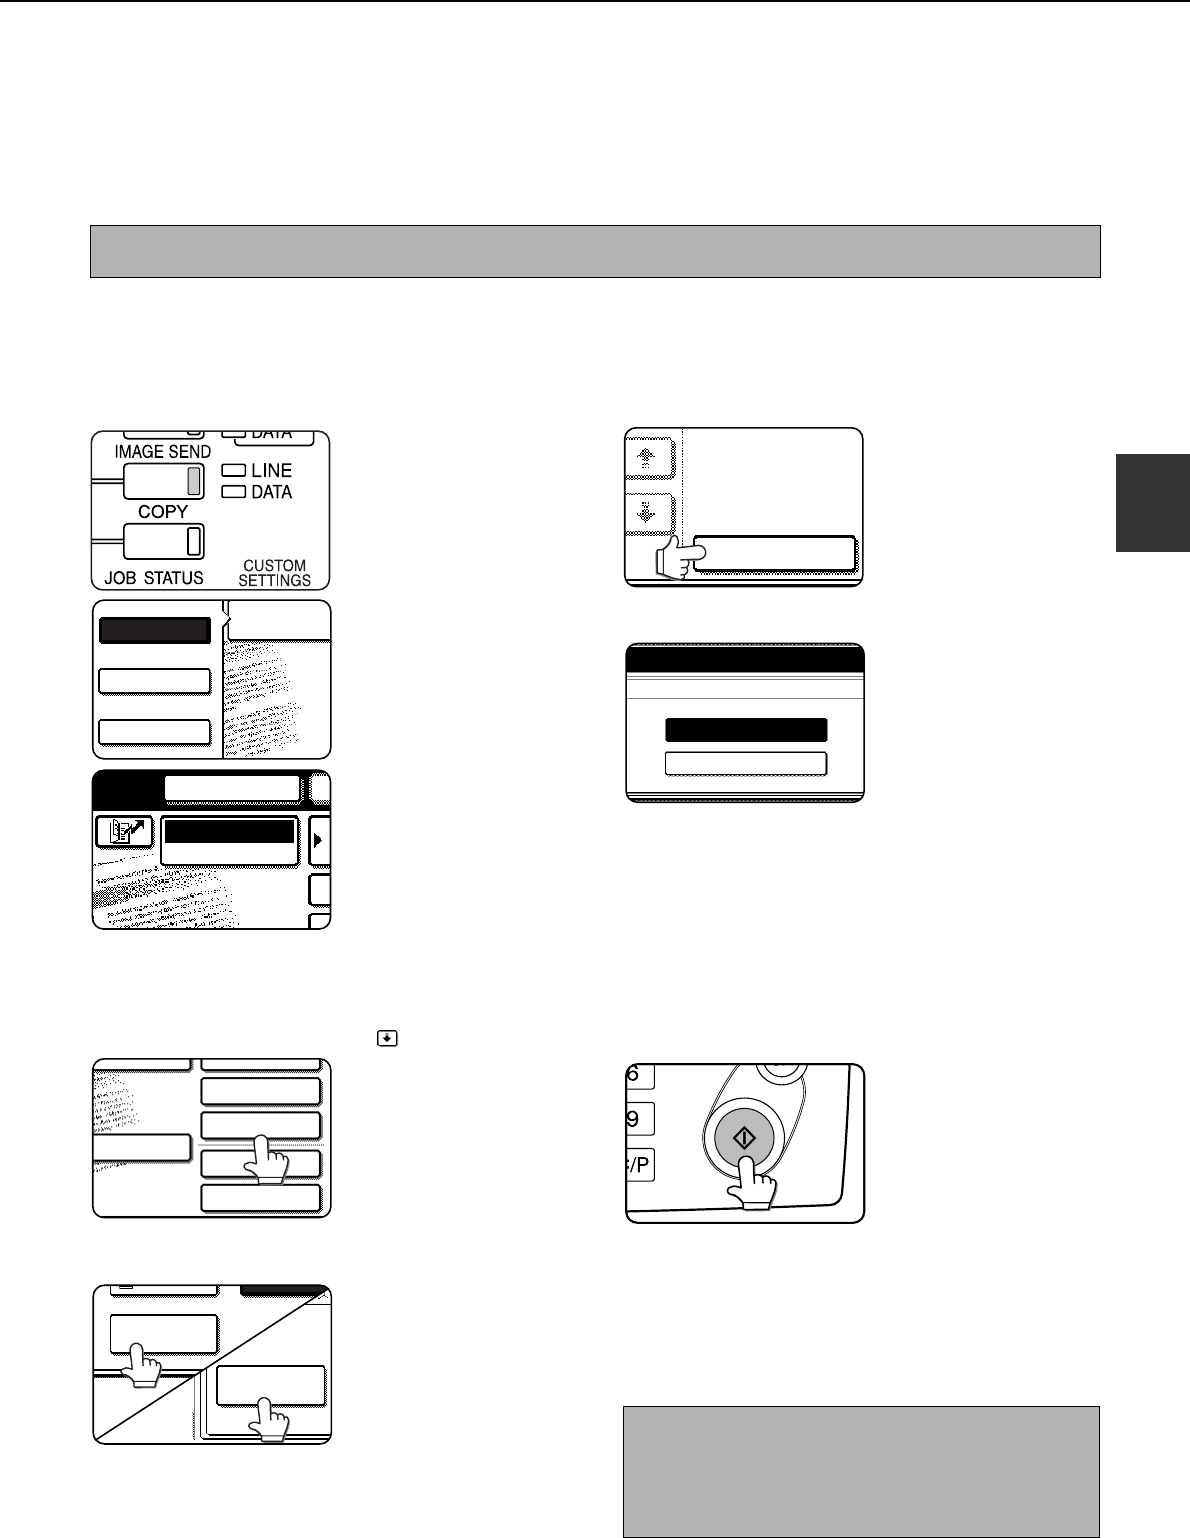
1
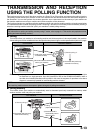
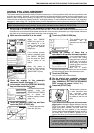
Make sure the machine is in fax mode.
When the [IMAGE
SEND] key light is on,
the machine is in fax
mode. If the light is not
on, press the [IMAGE
SEND] key.
If the network scanner
option is installed, touch
the [MODE SWITCH]
key and then the [FAX]
key to switch to fax
mode.
When fax mode is
selected, "FAX" appears
in the top half of the
[MODE SWITCH] key.
2
Place the original in the automatic
document feeder. (See page 1-7.)
3
In fax mode, touch the [SPECIAL MODES]
key and then touch the key.
If the address book screen
appears, touch the
[CONDITION SETTINGS]
key to display the
condition settings screen
(page 1-5).
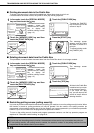
4
Touch the [MEMORY BOX] key and then
touch the [DATA STORE] key.
To cancel the operation,
touch the [CA] key.
5
Touch the [PUBLIC BOX] key.
This specifies that the
document will be
scanned into the Public
Box.
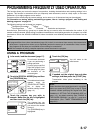
6
Setting the number of times that a
document in the public box can be polled.
If you want the document to
be cleared after polling
takes place once, touch the
[ONCE] key. If you want to
allow polling an unlimited
number of times, touch the
[UNLIMITED] key.
Note that if another
document is already in the public box, the new number
of times setting will apply to that document as well.
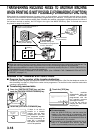
7
Touch the [OK] key.
You will return to the initial screen.
8
Set the original size, resolution, exposure
and other scanning conditions as needed.
(See "MANUALLY SETTING THE SCANNING
SIZE" on page 1-8, pages 1-10 to 1-11.)
9
Press the [START] key.
The document is scanned.
If other document data
has previously been
stored, the new data will
be added on after the old
data.
If you used the document glass and have another
page to scan,
change the pages and then press the
[START] key again. Repeat this procedure until all
pages have been scanned, and then touch the
[READ-END] key that appears in the message
screen. When the document data has been stored in
the Public Box, "JOB STORED." appears on the
screen, after which you will return to the initial screen.
NOTE
When using the polling memory function, do not set the reception mode to MANUAL RECEPTION.
FAX
E-MAIL/FTP
MODE SWITCH
INTERNET FAX
SPEAKER
MODE SWITCH
FAX
TO RECEPTION
MEMORY:100%
QUICK FILE
ADDRESS REVIEW
SPECIAL MODES
FILE
SUB ADDRESS
MODE SWITCH
DATA STORE
MEMORY BOX
SENDINGBUILD
NOTE
To cancel scanning
To cancel scanning of a document while scanning is in
progress, press the [C] key. To delete a document that
has already been scanned, see "Deleting document
data from the Public Box" on the following page.
PUBLIC BOX
X - DATA STORE
THE NUMBER OF SENDING.
ONCE
UNLIMITED