


29
2
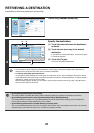
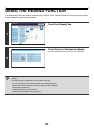
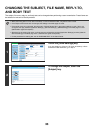
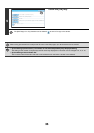
Switch to scan mode and display the
image settings screen.
(1) Touch the [Scan] tab.
(2) Touch the [Original] key.
The current settings for [Original], [Exposure], [Resolution], [File Format], and [Colour Mode] are indicated at the right
of each key. To change a setting, touch the appropriate key.
☞ AUTOMATICALLY SCANNING BOTH SIDES OF AN ORIGINAL (2-Sided Original) (page 55), SPECIFYING THE
ORIGINAL SCAN SIZE AND SEND SIZE (Enlarge/Reduce) (page56), CHANGING THE EXPOSURE AND
EXPOSURE MODE (ORIGINAL IMAGE TYPE) (page 62), CHANGING THE RESOLUTION (page 64),
CHANGING THE FILE FORMAT (page 65), CHANGING THE COLOUR MODE (page 69), 4. SPECIAL MODES
(page 70)
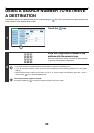
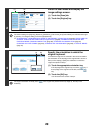
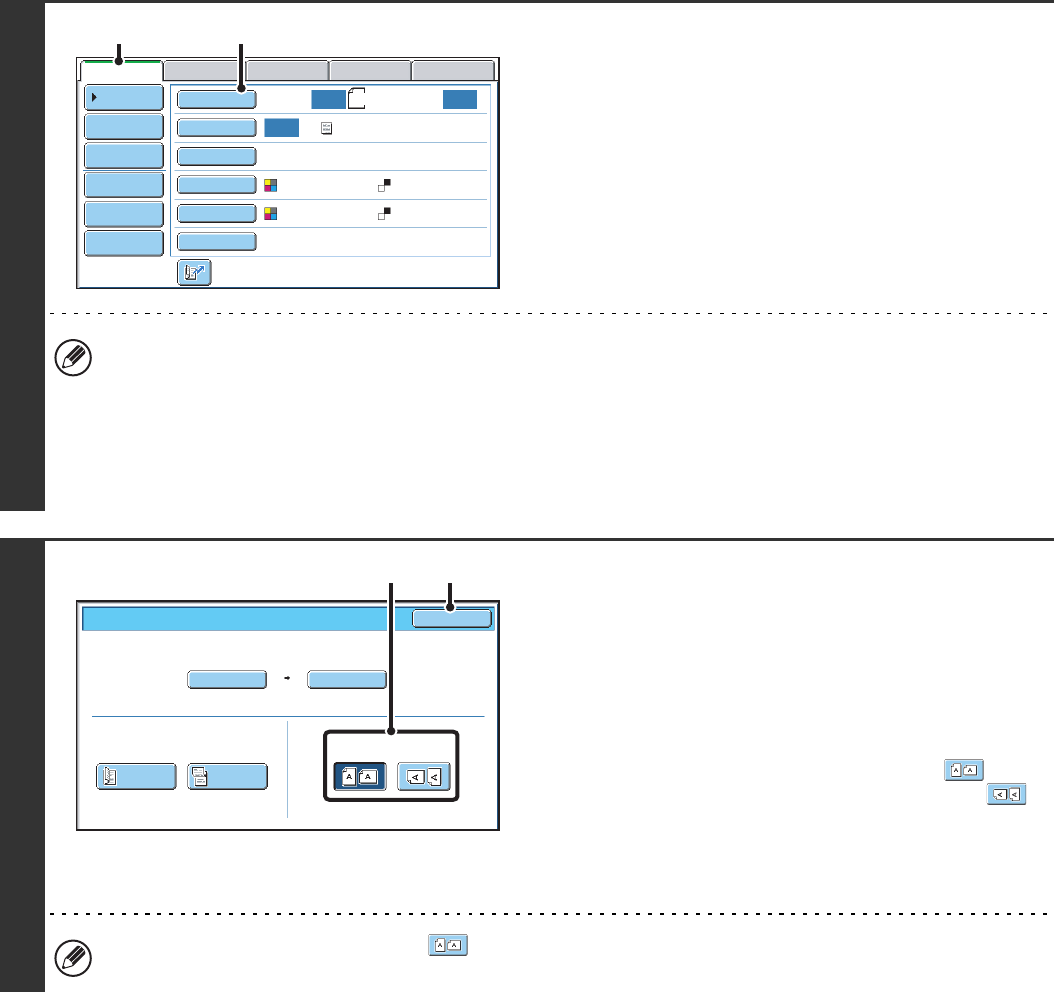
3
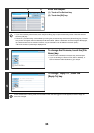
Specify the orientation in which the
original is placed.
To enable the original to be scanned in the correct orientation
(the orientation of the top edge of the original that is shown at
the top of the display), specify the orientation in which the
original was placed in step 1.
(1) Touch the appropriate orientation key.
If the top edge of the original is up, touch the key. If
the top edge of the original is to the left, touch the
key.
(2) Touch the [OK] key.
You will return to the screen of step 2.
The original orientation is initially set to . If the original was placed with the top edge up, this step is not
necessary.
Auto Auto
Auto
File
Quick File
Address Review
Send Settings
Address Entry
Address Book
USB Mem. ScanFaxInternet Fax PC Scan
Special Modes
Colour Mode
File Format
Resolution
Exposure
Original
Scan:
Scan
Send:
Text
200X200dpi
PDF
Auto/Greyscale
Mono2
PDF
A4
(1) (2)
Scan/Original
OK
Auto
Scan Size
2-Sided
Tablet
2-Sided
Booklet
Send Size
100%
Image Orientation
Auto A4
(2)(1)