75
3
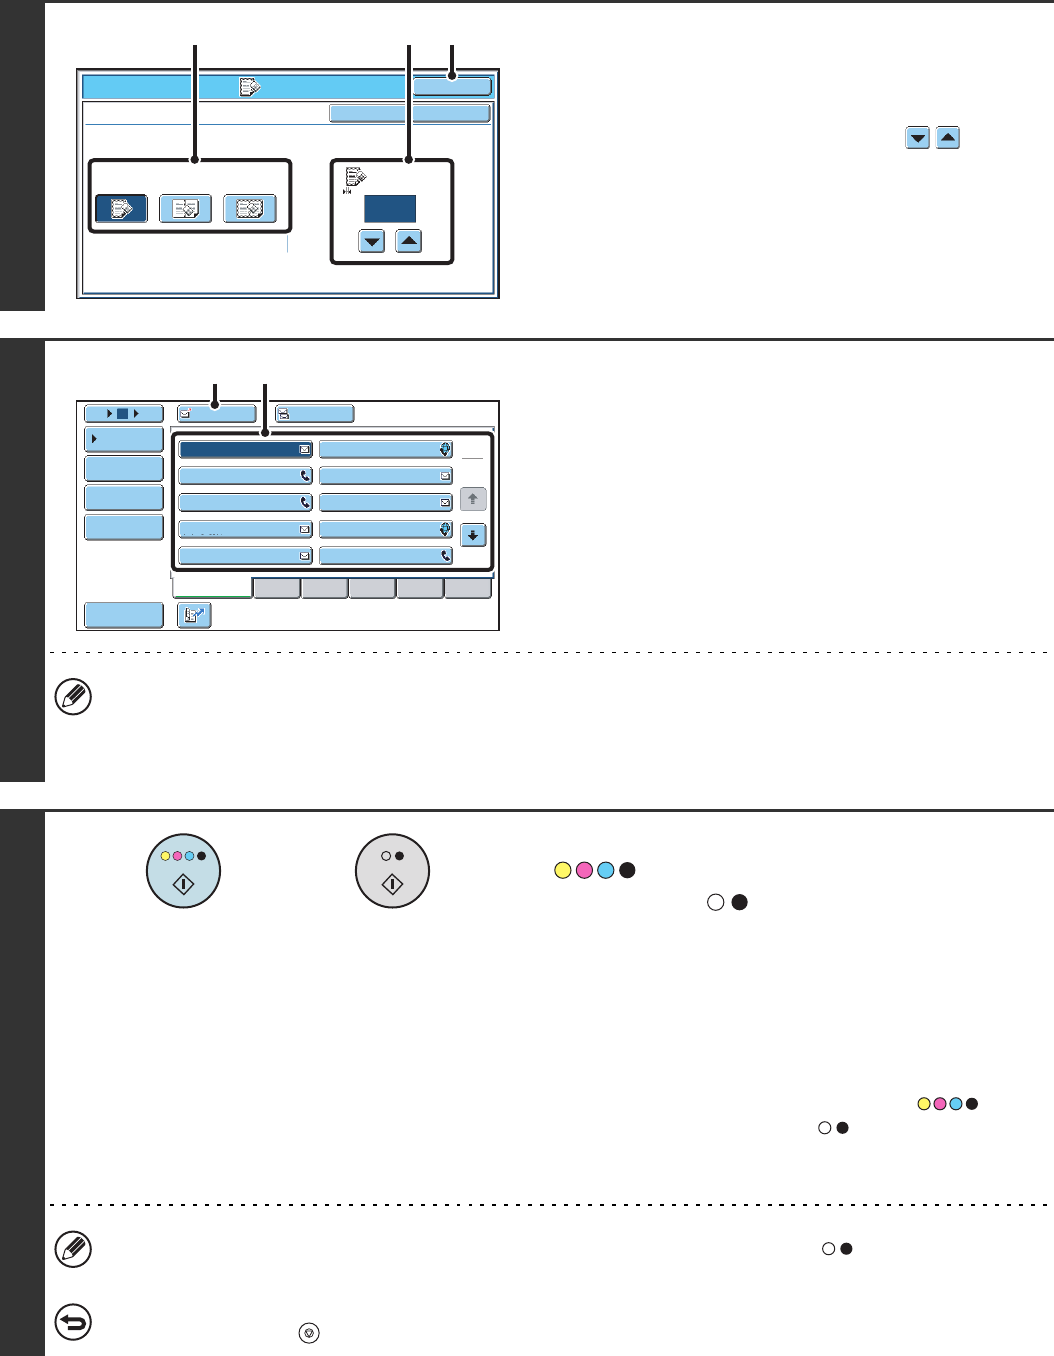
Select the erase settings.
(1) Touch the desired erase mode.
Select one of the three erase modes.
(2) Set the erasure width with the keys.
0 mm to 20 mm (0" to 1") can be entered.
(3) Touch the [OK] key.
4
Specify the destination.
(1) Touch the [Address Book] key in the base
screen.
(2) Touch one-touch keys of the destinations
that you wish to store in the group.
(3) Touch the [To] key.
• When scanning to USB memory, there is no need to specify the destination. Go to step 5.
• In addition to specification by a one-touch key, a destination can also be specified by a search number. You can
also manually enter an e-mail address or look up an e-mail address in a global address book. For more information,
see "2. ENTERING DESTINATIONS" (page 20).
5
Press the [COLOUR START] key
( ) or the [BLACK & WHITE
START] key ( ).
Scanning begins.
• If you inserted the original pages in the document feeder
tray, all pages are scanned.
A beep will sound to indicate that scanning is finished.
• If you are scanning the original on the document glass, scan
each page one page at a time.
When scanning of one page finishes, replace it with the next
page and press the [COLOUR START] key ( ) or the
[BLACK & WHITE START] key ( ). Repeat until all pages
have been scanned and then press the [Read-End] key.
A beep will sound to indicate that scanning is finished.
If the destination is an Internet fax destination, press the [BLACK & WHITE START] key ( ).
To cancel scanning...
Press the [STOP] key ( ) to cancel the operation.
Scan/Special Modes
OK
Erase
Edge
Erase
Edge
10
(0~20)
mm
Centre
Erase
Edge+Centre
Erase
OKCancel
(2) (3)(1)
AAA AAA
To Cc
III III
GGG GGG
EEE EEE
CCC CCC
HHH HHH
FFF FFF
DDD DDD
BBB BBB
ABCD
Frequent Use
EFGHI JKLMN OPQRST UVWXYZ
1
2
5
15
10
Global
Address Search
Address Entry
Sort Address
Address Review
Condition
Settings
JJJ JJJ
(3) (2)
or
