


73
2
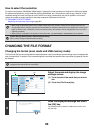
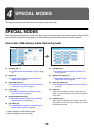
Select the special modes.
(1) Touch the [Special Modes] key.
(2) Touch the [Program] key.
☞ SPECIAL MODES (page 70)
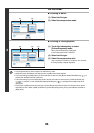
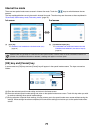
3
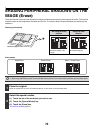
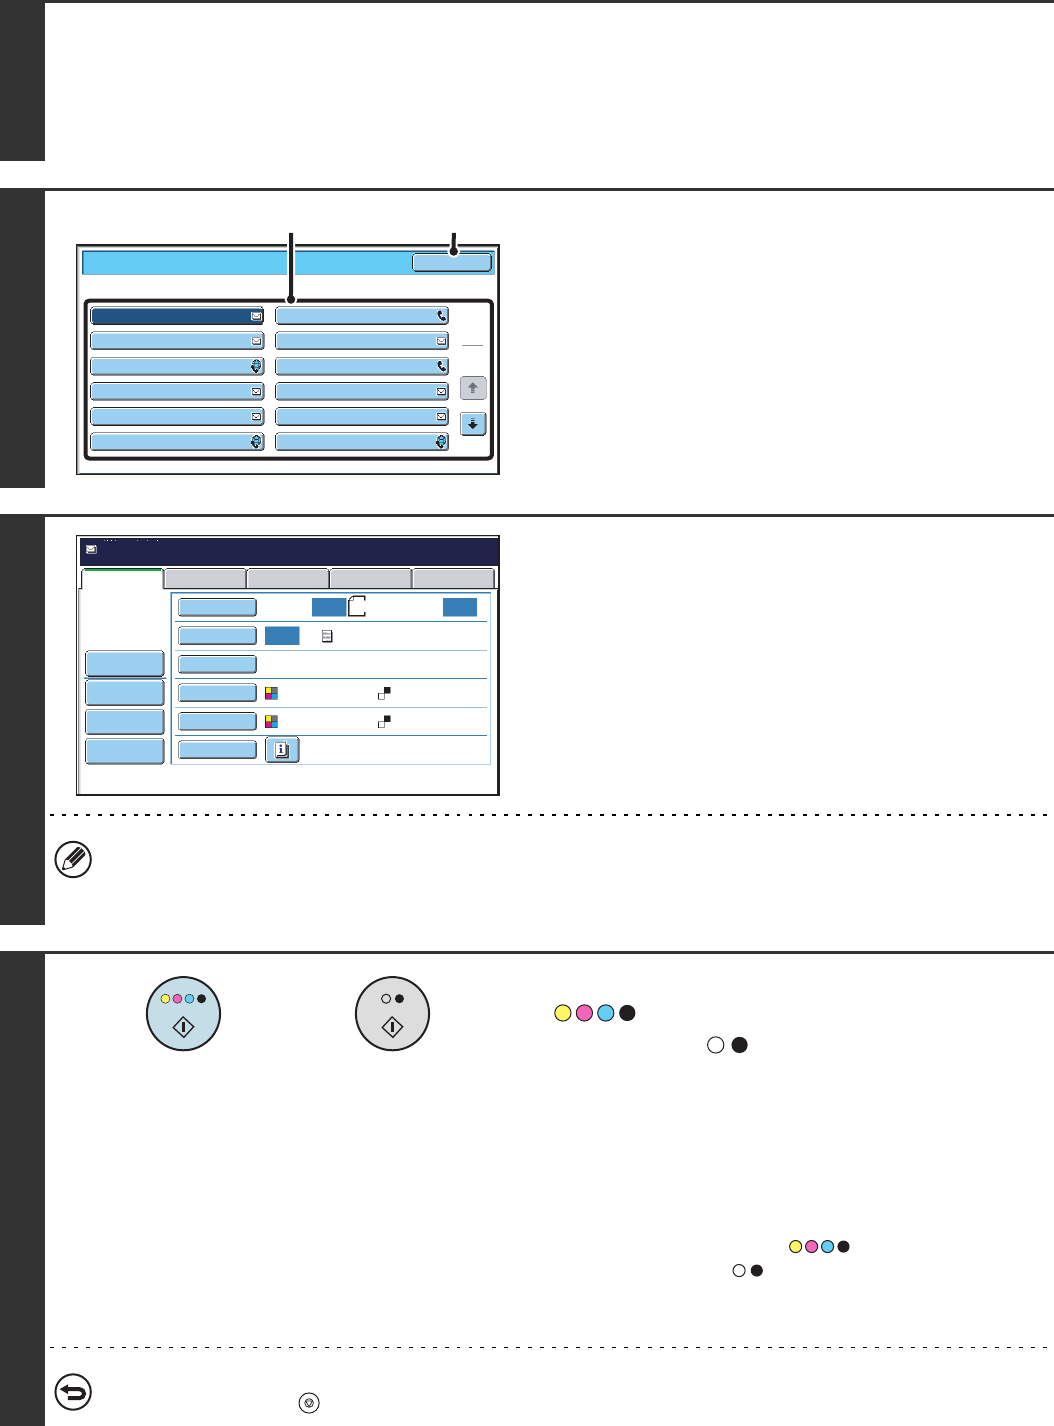
Retrieve the stored program.
(1) Touch the desired program key.
(2) Touch the [OK] key.
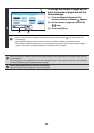
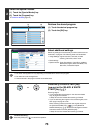
4
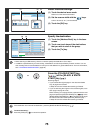
Select additional settings.
Select any settings or functions that you wish to use that cannot
be stored in a program. The following items can be selected.
• Image Settings: original scan size, send size, 2-sided
scanning, file format, colour mode
• Send settings
• Special modes: Timer Transmission, Card Shot, Job Build,
Mixed Size Original, Slow Scan Mode, File,
Quick File, Transaction Report
• The screen that appears will vary depending on the destination stored in the program.
• The mode cannot be changed here.
• Functions stored in the program cannot be cancelled here.
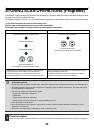
5
Press the [COLOUR START] key
( ) or the [BLACK & WHITE
START] key ( ).
Scanning begins.
• If you inserted the original pages in the document feeder
tray, all pages are scanned.
A beep will sound to indicate that scanning is finished.
• If you are scanning the original on the document glass, scan
each page one page at a time.
When scanning finishes, place the next original and press
the [COLOUR START] key ( ) or the [BLACK &
WHITE START] key ( ). Repeat until all pages have been
scanned and then touch the [Read-End] key.
A beep will sound to indicate that scanning is finished.
To cancel scanning...
Press the [STOP] key ( ) to cancel the operation.
Program
Program 3
Program 1
Program 5
Program 7
Program 9
Program 11
Program 4
Program 2
Program 6
Program 8
Program 10
Program 12
1
2
OK
(1) (2)
Auto Auto
Auto
File
Quick File
Send Settings
USB Mem. ScanFaxInternet Fax PC Scan
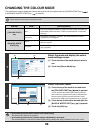
Special Modes
Colour Mode
File Format
Resolution
Exposure
Original
Scan:
Scan
Send:
Text
200X200dpi
PDF
Auto/Greyscale Mono2
PDF
Program:Program 1
xxx@xx.xxx.com
Address Review
A4
or