


-8
34
34
34
28
27
27
30
27
46
28
26
28
11
25
34
47
25, 46
25, 46
Numbers in refer to the main pages in this operation manual where the topic is explained.
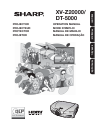
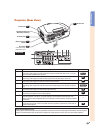
Projector
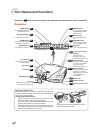
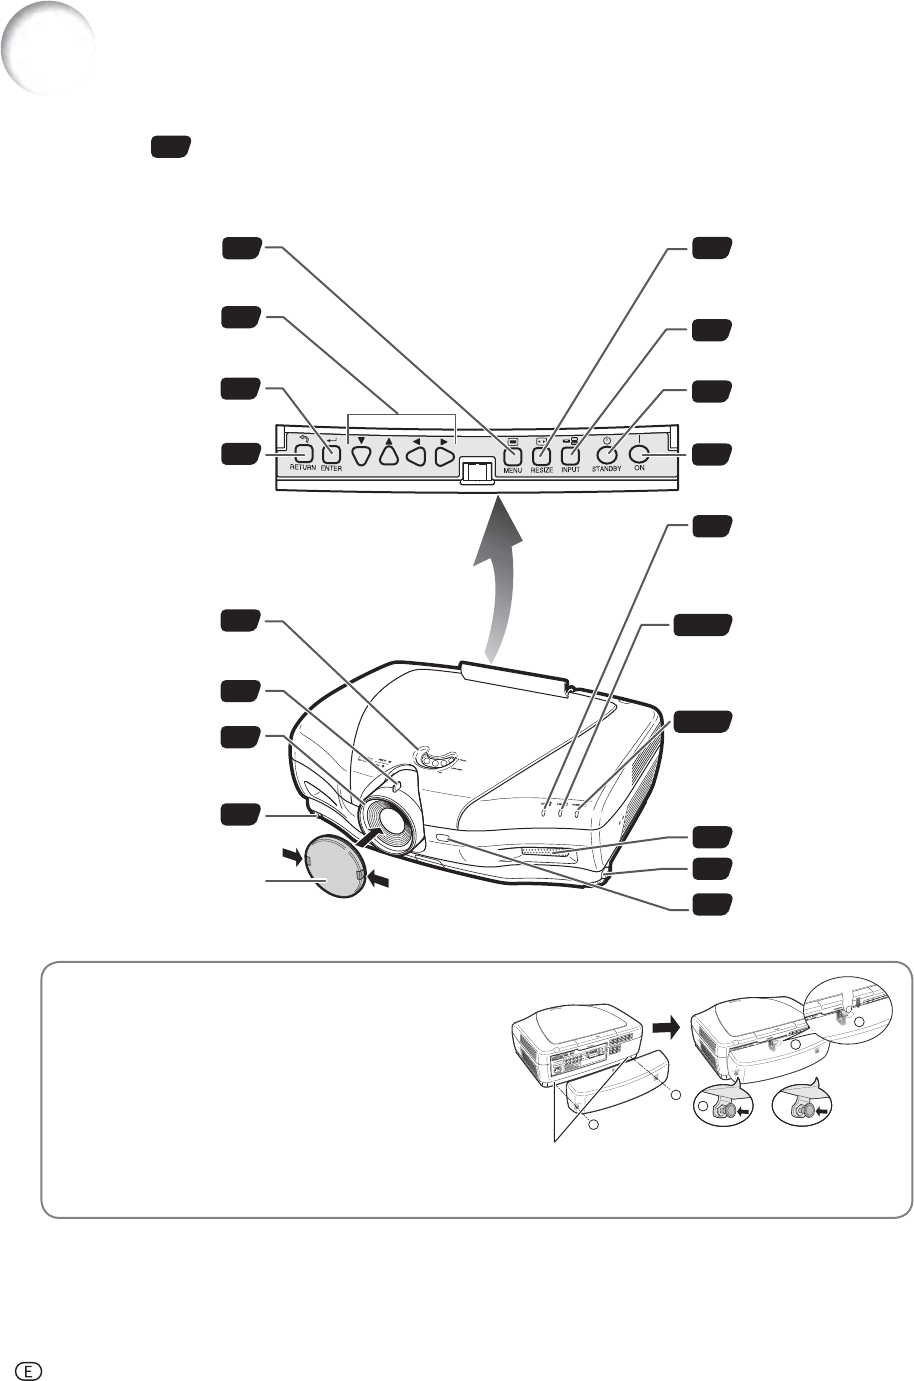
Part Names and Functions
3
2
1
1
3
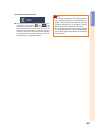
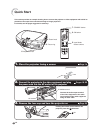
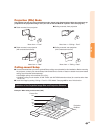
Using the Terminal Cover
When the projector is used on a desktop, high mounted
or ceiling mounted, attach the terminal cover (supplied) to
hide the connecting cables.
Attaching the Terminal Cover
Align the hook on the terminal cover with the insert
hole in the hook at the back of the projector.
Press the hook in the direction indicated with the ar row
to fasten the ter minal cover to the projector.
Insert the terminal cover into the mounting groove on
the projector while pushing the tabs inside the terminal
cover to the out side with your fi ngers.
Remove the rubber cap attached on the pro-
jector and at tach the hooks.
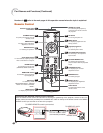
MENU button
For displaying adjustment
and setting screens.
Adjustment buttons
(, ,,)
For selecting menu items.
ENTER button
For setting items selected
or adjusted on the menu.
RETURN button
For undoing an operation.
RESIZE button
For switching the screen
size (SIDE BAR, SMART
STRETCH, etc.).
INPUT button
For displaying the Input
list.
STANDBY button
For putting the projector
into the standby mode.
ON button
For turning the power on.
Lens shift dial
For moving the projected
image vertically.
Zoom knob
Focus ring
Adjustment foot
Lens cap
Pressing the two tabs, you can
remove/attach the lens cap.
Temperature warning
indicator
When the internal
temperature rises, this
indicator will illuminate red.
Lamp indicator
Illuminates blue, indicating
normal function. Replace
the lamp when the
indicator illuminates red.
Power indicator
Illuminates red, when the
projector is in standby.
When the power is turned
on, this indicator will
illuminate blue.
Intake vent
Adjustment foot
Remote control sensor
PUSH!