


Setting Up the 4000i 17
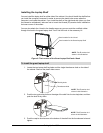
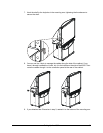
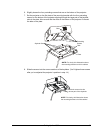
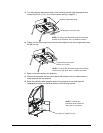
6. Slightly loosen the four protruding screws that are on the bottom of the projector.
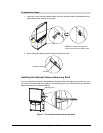
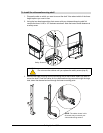
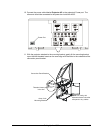
7. Set the projector on the flat plate of the mounting bracket with the four protruding
screws on the bottom of the projector slipping through the large part of the keyhole
slots in the plate. Also ensure that the slots on the bottom of the projector fit around
the tabs on the plate.
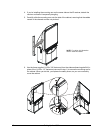
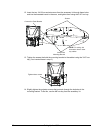
8. Slide the screws into the narrow sections of the keyholes. (You’ll tighten these screws
after you’ve adjusted the projector’s position in step 14.)
Protruding
Screws
Keyhole Slots
NOTE: For clarity, this illustration shows
the mounting bracket out of the cabinet.
Slots
Tabs
Plate
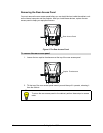
Slide the screws into the
narrow part of the keyholes
NOTE: For clarity, this illustration shows
the mounting bracket out of the cabinet.