


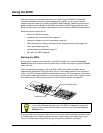

46 Using the 4000i
Changing Video Display Sources
To see the video output from the DVD player (or the device connected using the S-video port
on the connection panel), press the Display Source button until the Video IN LED illuminates.
To see the video output from a composite video source (such as a VCR), press the Display
Source button until the Video IN LED illuminates and then press the Video Source button on
the projector’s remote control. (Make sure you turn on the remote control.)
To see the video output from a DVI video source, press the Display Source button until the
Video IN LED illuminates and then press the DVI Source button on the remote control.
If you press the Display Source button, you reset the 4000i. ll no longer see the composite or
DVI video image. To return to these video sources, you must repeat the process, including the
remote control button press.
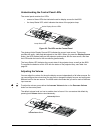
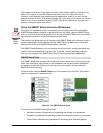
Using the Guest Laptop
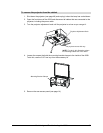
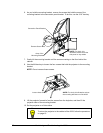
When you connect the guest laptop’s cables (see page 23) and press the Display Source
button, the 4000i immediately switches to the guest laptop for video, data and audio input.
You’ll see the laptop’s video output on the interactive screen, you’ll hear the laptop’s audio
through the 4000i’s speakers, and, as long as you have SMART Board software open on your
laptop, you can control the interactive whiteboard. (For details on installing SMART Board
software, see page 37.)
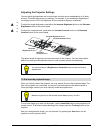
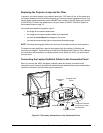
If you switch away from the guest laptop source, you can return to it by pressing the Display
Source button. The Active Display Source LED beside the guest laptop icon blinks slowly as
the projector synchronizes the video image. When the laptop is ready for use, this LED
remains illuminated.
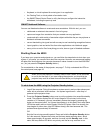
If the cursor doesn’t accurately track your finger contact on the screen, orient the interactive
whiteboard for the laptop (page 39). Also, if you can’t see an image, make sure the laptop’s
external video port is active. Some laptop computers can’t send a video signal to both the
attached screen and the external video port or an external monitor at the same time. You may
need to deactivate the internal video port on your laptop or put the internal and external video
ports into simultaneous display mode, so that the laptop displays on both the laptop monitor
and the interactive whiteboard.
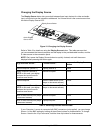
With newer Windows laptops, you can synchronize the internal and external video ports at the
software level, as follows:
1. From the Start menu, select Settings > Control Panel > Display.
2. Click the Refresh (or Monitor Refresh) tab.
3. Click the CRT/Panel option to activate the monitor and external video port display.
This may not be possible with older laptop models, so you may need to switch back
and forth between the internal and external video port. If you aren’t sure which
commands or keyboard combinations are required to do this, check the owner’s
manual for your laptop.