


9 | CHAPTER 2 – INSTALLING AND SECURING YOUR SMART BOARD
INTERACTIVE WHITEBOARD
CAUTIONS
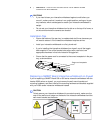
• If you need to lean your interactive whiteboard against a wall before you
mount it, make sure that it remains in an upright position, resting on its pen
tray brackets, which are designed to sustain your interactive whiteboard’s
weight.
• Do not rest your interactive whiteboard on its side or on the top of its frame, or
on the corners where the cameras are located.
Installation Tips
• Ensure the bottom of the pen tray is unobstructed at all times, because you
will need to access it if the interactive whiteboard requires service.
• Install your interactive whiteboard on a flat, plumb wall.
• If you’re installing the interactive whiteboard on drywall, use all the toggle
bolts supplied. If one of the bracket holes aligns with a wall stud, use
appropriate hardware in that hole instead of a toggle bolt.
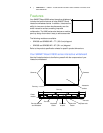
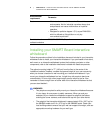
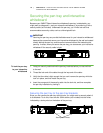
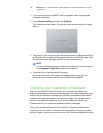
• Ensure that the power cord is connected to the correct receptacle in the pen
tray, as shown below.
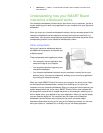
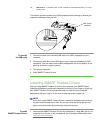
Replacing a SMART Board interactive whiteboard on drywall
If you’re replacing a SMART Board 500 or 600 series interactive whiteboard with the
heavier X800 series on drywall, you must remove the wall-mount bracket and
mounting hardware, and then install all the mounting hardware and brackets supplied
with your X800 series interactive whiteboard instead.
CAUTION
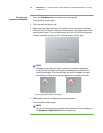
To help ensure your interactive whiteboard is mounted correctly, make sure the
color of the wall-mount hanger on the back of the interactive whiteboard and the
wall-mount bracket are the same.
Power cord receptacle