


4
4-5
GFK-0121E
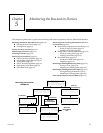
Chapter 4 Device Configuration: Overview
Configuring a Remote I/O Scanner
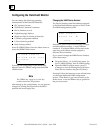
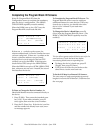
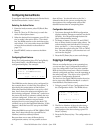
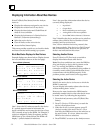
After selecting the baud rate, the next Program
Block ID screen is used to assign data types and
lengths for a Series 90-70 Remote I/O Scanner.
PROG REMOTE MAP
%I
LENGTH(PTS)
tgl ref send nxt
Configuration Notes
The Remote I/O Scanner User’s Manual explains
remote drop configuration in detail. You should
use it as a reference during remote drop
configuration.
Also, look over the information below. Especially,
note that it is not always possible or desirable to
use a HHM for remote drop configuration.
If the remote drop includes any Analog Expan-
der Modules, Logicmaster 90 must be used for
configuration; do not use a HHM.
When a remote drop is configured with a
HHM, all I/O modules will operate in default
mode; module options can only be configured with
the Logicmaster 90-70 software.
Unless the Remote I/O Scanner is configuration
protected, pressing F3 (send) from the Remote
Map configuration screen causes the HHM to
automatically configure the remote drop. This
configuration will REPLACE any existing I/O
configuration (including one entered using Lo-
gicmaster 90-70), and return I/O module op-
tions to their original defaults.
Remote drops configured with Logicmaster
90-70 are automatically protected. Please check
carefully before removing configuration protec-
tion with a Hand-held Monitor.
The Hand-held Monitor automatically creates a
configuration for a nine-slot rack, regardless of
the actual rack size. If the remote drop has a
five-slot rack, the HHM will later assume that
there are unfilled slots. If this is a problem, Lo-
gicmaster 90-70 can be used for configuration,
or to edit an automatic configuration done with
a Hand-held Monitor. Then, the configuration
can be stored to the Remote I/O Scanner.
Configuring the Remote Drop
To configure the remote drop with the HHM:
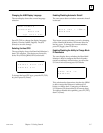
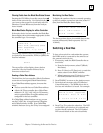
1. Enter a starting address and length for: %I (dis-
crete inputs), %Q (discrete outputs), %AI (ana-
log inputs), %AQ (analog outputs) on the
screen shown at left. The data lengths must
not add up to more than 128 bytes of inputs
and 128 bytes or outputs. If they do, an error
message will appear when you attempt to send
the data to the Remote I/O Scanner.
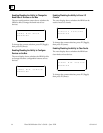
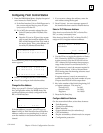
2. Next, press F2 (drop) and enter a Remote Drop
ID (between 16 and 254).
PROG REMOTE MAP
DROP ID _____________
tgl drp send nxt
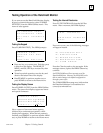
3. Press the F3 (send) key to download these
selections to the Remote I/O Scanner.
Note: Do not perform this step if you want to
preserve a configuration entered using the Lo-
gicmaster software.
The HHM configures the I/O references of Se-
ries 90-70 I/O modules (only) in the remote
drop. It assigns references in ascending order,
starting with the slot next to the Remote I/O
Scanner. The leftmost module of each type (%I,
%Q, %AI, or %AQ) in the rack receives the first
available reference of the appropriate type.
4. Press F4 (nxt) to go to the Program Block ID
screen.
5. After completing these screens, press F2 (Con-
figure Block) to complete the Genius configura-
tion screens, or to display information about
the I/O modules in the remote drop.
The module description screens that appear
during the configuration sequence are read-
only; boards cannot be configured here.
Go through these block description screens to
configure:
BSM Present
BSM Controller
CPU Redundancy
Configuration Protection