


33
Chapter 3 Basic Usage
• If the AIT autoloader is used in a high-humidity environment or a location that
is subject to wide variations in temperature, condensation may prevent the
cartridge read/write operation.
• If the cartridge does not need to be written to or read from, do not insert or
eject it too often.
Storing
• Store cartridges in an appropriate environment.
Store cartridges according to the temperature and other surrounding
conditions written on the package. Also, try to keep the temperature and
humidity of the environment constant. Store cartridges out of the direct sun
rays. Do not store them near heating systems. Never place cartridges on a
dashboard or in the glove compartment of a car.
• Store cartridges in a dustless environment.
Eliminate sources of dust. Avoid eating, drinking, or smoking near the storage
location. Also, do not store cartridges near copying machines or printers that
emit toner and paper dust.
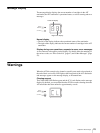
• When storing cartridge, set the erase-protection tab so that the data cannot be
over written.
• After removing a cartridge from the autoloader, store it in an appropriate
location as soon as possible.
Avoid, as much as possible, changes of temperature and density,
contamination by dust and scratches made by touching the interior tape.
Maintenance
Perform the following periodically.
• Clean the air filter.
If the front panel air filter becomes clogged with dust, the AIT autoloader may
overheat, resulting in damage. Periodically clean the air filter with a vacuum
cleaner. (We recommend monthly cleaning.) For details about how to remove
the air filter, see “Cleaning the Air Filter” (page 41) in the “Appendix”.
• Clean the AIT drive.
Clean the AIT drive on a weekly basis. You are notified that the AIT drive
needs cleaning by a flashing green CLEANING LED and a message when the
AIT autoloader has been online for approximately a week. If the 2
MAINTENANCE DIP switch at the back of the AIT autoloader is in the off
position, you are not notified when cleaning becomes necessary. By default,
this DIP switch is in the on position. For details, see “Setting the DIP
Switches” (page 19).