


21(GB)
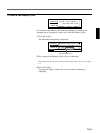
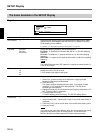
11If the compile result is satisfactory, press the F4 key.
“Finish compiling” is displayed, then the reverb program name setting
menu appears.
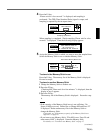
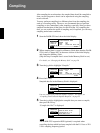
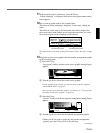
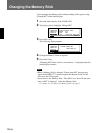
12Set a reverb program name to the compiled data.
The name set during sampling is displayed. If necessary, change the
name.
The name set at this stage is the final name, and will be displayed as
the reverb source name and the reverb program name when you select
the reverb program on the sampling reverb software.
SAMPLE EnterDelete
t
Rehearsal
Sampling
Compile
Change MS
!
I
&()*+-./<=>? 0123456789
abcdefghijklmnopqrstuvwxyz
ABCDEFGHIJKLMNOPQRSTUVWXYZ
(03)[Church A ]
[1:C12 ]
@
The input method is the same as that for the memory label. See step 7 on page
14.
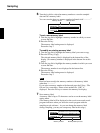
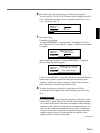
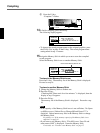
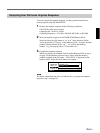
13Assign the reverb source graphic and mic/speaker arrangement graphic
to the reverb program.
1 Press the F4 key.
“Jog picture” flashes, and the reverb source graphic setting display
appears.
Enter
SAMPLE
[(03)Church A ] Jog picture[
[1:C12 ]
O O
O O
2 Turn the jog dial to select the reverb source graphic.
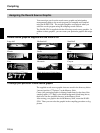
For the graphics to be selected, see “Reverb source graphics supplied
with the DASK-S704” on page 24.
You can assign your particular graphic. For details, see “To assign your
particular reverb source graphic” on page 24.
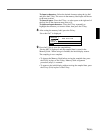
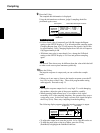
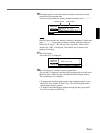
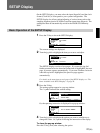
3 Press the F4 key.
“Jog mic” flashes, and the mic/speaker arrangement setting display
appears.
EnterEsc
SAMPLE
[(03)Church A ] Jog mic
[1:C12 ]
O O
4 Turn the jog dial to select the mic/speaker arrangement graphic.
• When you do not want to assign any mic/speaker arrangement
graphic, press the F3 key (Esc) to skip this step.
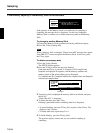
Reverb source name Reverb program name
(continued)