


2-19
SRX-T420
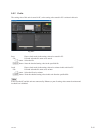
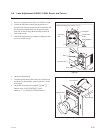
9. Set Lamp Power to 53% in the “LAMP POWER”
menu on the INSTALLATION window of SRX Con-
troller immediately after the lamp is lit.
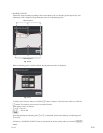
10. Project the white image on the screen using “Test
Mode 1” in the “TEST PATTERN” menu.
n
If it is diffi cult to observe the left, right, top and bot-
tom edges of the white image because it is interrupted
by the black curtain and so on, reduce the white image
size using the zoom so that its edges can be viewed
clearly. Adjust the zoom in “LENS CONTROL”. In the
case of out-of- focus, adjust it in the same way.
(Refer to “2-7-2. INSTALLATION Window”.)
11. Perform steps 12 to 14 immediately after step 10 is
fi nished.
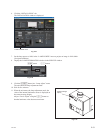
12. Observe the left, right, top and bottom edges of the
screen precisely.
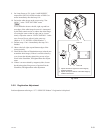
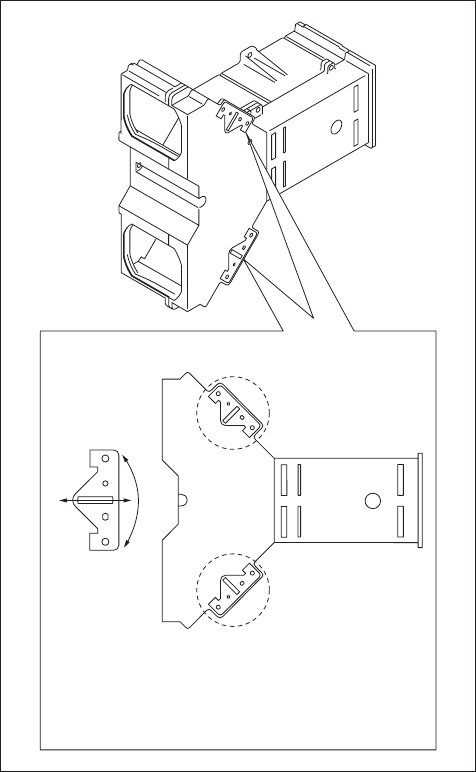
13. Check the deviation of illumination range (colored area
around the white image). If there is an area colored by
cyan, loosen the adjusting plate fi xing screws of por-
tion A in the illustration, and tighten them after adjust-
ment.
14. If there is an area colored by magenta/yellow, loosen
the adjusting plate fi xing screws of portion B in the
illustration, and tighten them after adjustment.
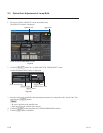
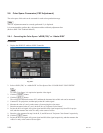
2-5-2. Registration Adjustment
Perform adjustment referring to “2-7-3. SERVICE Window” if registration is displaced.
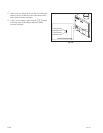
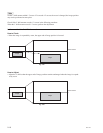
Portion A
Portion B
Adjusts the left and right of the white image by
parallel movement.
Adjusts the top and bottom of the white image by
rotational movement.
Fig. 2-5-1d