13
Automatic Install
1. If you selected Automatic Install, (All
Fonts) at Step 6 on page 12, the install
program will prompt you to insert Floppy
disk #2, and will automatically proceed with
installing all 35 TrueType fonts before requesting
you to select a default printer.
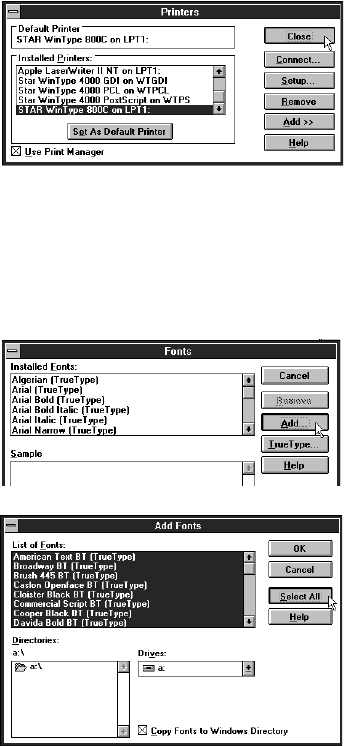
2. When the TrueType fonts have been installed,
you will be prompted to select a default
printer. The install program will automatically
open up the Printer's dialog box in the Control
Panels.
3. Double-click on STAR WinType 800C
on LPT1: if the printer port you are
using is LPT1. If your computer has
only 1 parallel port, LPT1 is the name
of the port.
4. Click Close to continue.
5. When the installation is done, you will
see a message telling you that the
installation of the printer driver was
completed successfully. Click on Re-
start to restart Windows or Quit.
Custom Install
1. If you selected Custom Install, the in-
stall program will prompt you to insert
Floppy disk #2 and will open up the
Fonts icon in the Control Panel.
2. Click on the <Add> button.
3. Select the appropriate drive (a:\ or b:\)
(Drives list box) for the fonts on disk
#2. The fonts will appear in the List
of Fonts box.
4. Select the fonts you want to add by
clicking on their names. To select all
of the fonts, click the Select All button.
