“computer paper.”
It can be as narrow as 3”, and up to 10” wide
(5” to 15 $4” on SD-I 5,.
To use this kind of paper, you’ll need to install the tractor unit,
with its two “sprocket” wheels to carry the paper along.
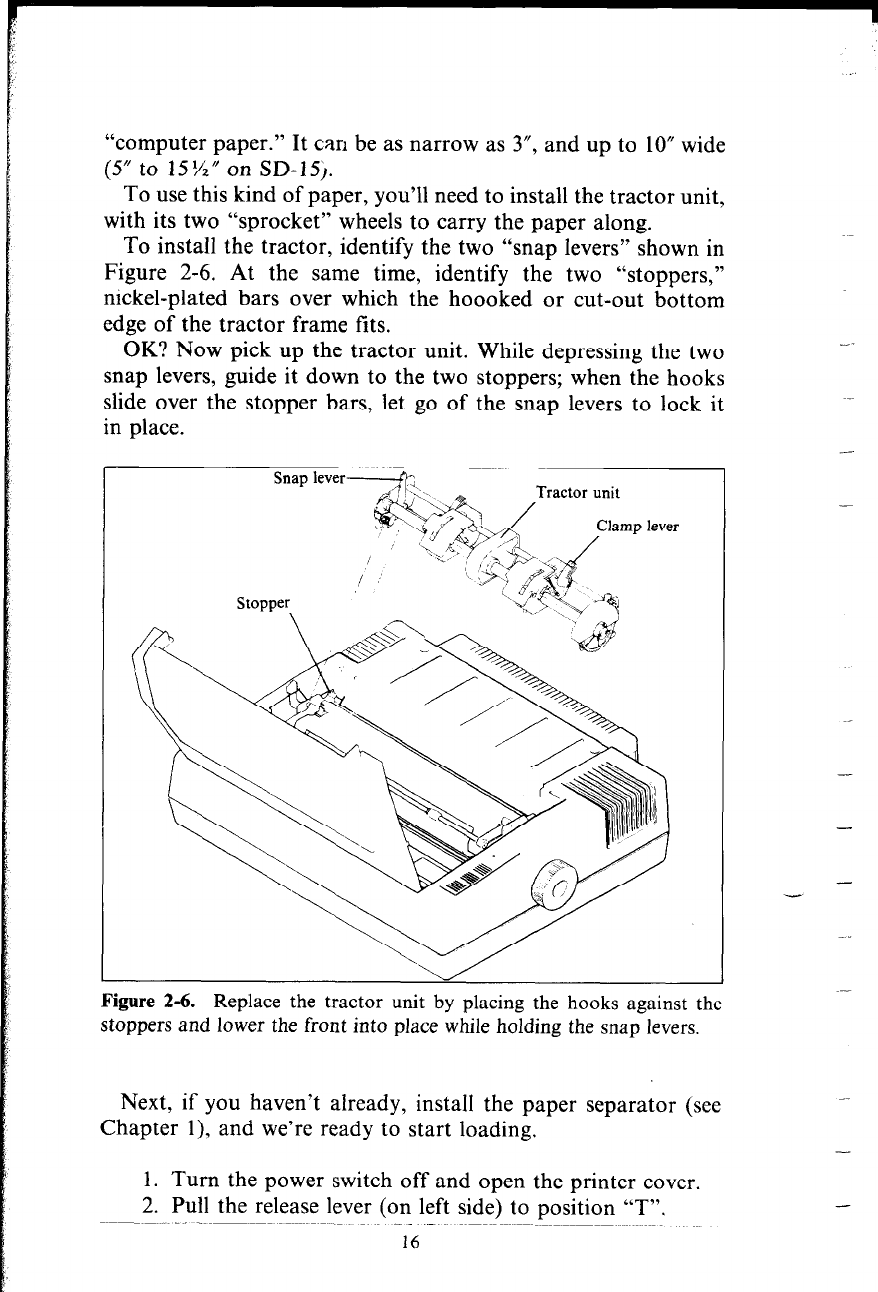
To install the tractor, identify the two “snap levers” shown in
Figure 2-6. At the same time, identify the two “stoppers,”
nickel-plated bars over which the hoooked or cut-out bottom
edge of the tractor frame fits.
OK? Now pick up the tractor unit. While depressing the two
snap levers, guide it down to the two stoppers; when the hooks
slide over the stopper bars, let go of the snap levers to lock it
in place.
Stopper
Figure 2-6. Replace the tractor unit by placing the hooks against the
stoppers and lower the front into place while holding the snap levers.
Next, if you haven’t already, install the paper separator (see
Chapter 1), and we’re ready to start loading.
1. Turn the power switch off and open the printer cover.
2. Pull the release lever (on left side) to position “T”.
16
-
-
-.
-
-


