Step Operation Description
4 Delete VLAN. Optional. On the VLAN→Private VLAN→PVLAN Config
page, select the desired entry to delete the corresponding
VLAN by clicking the Delete button.
6.10 Application Example for Private VLAN
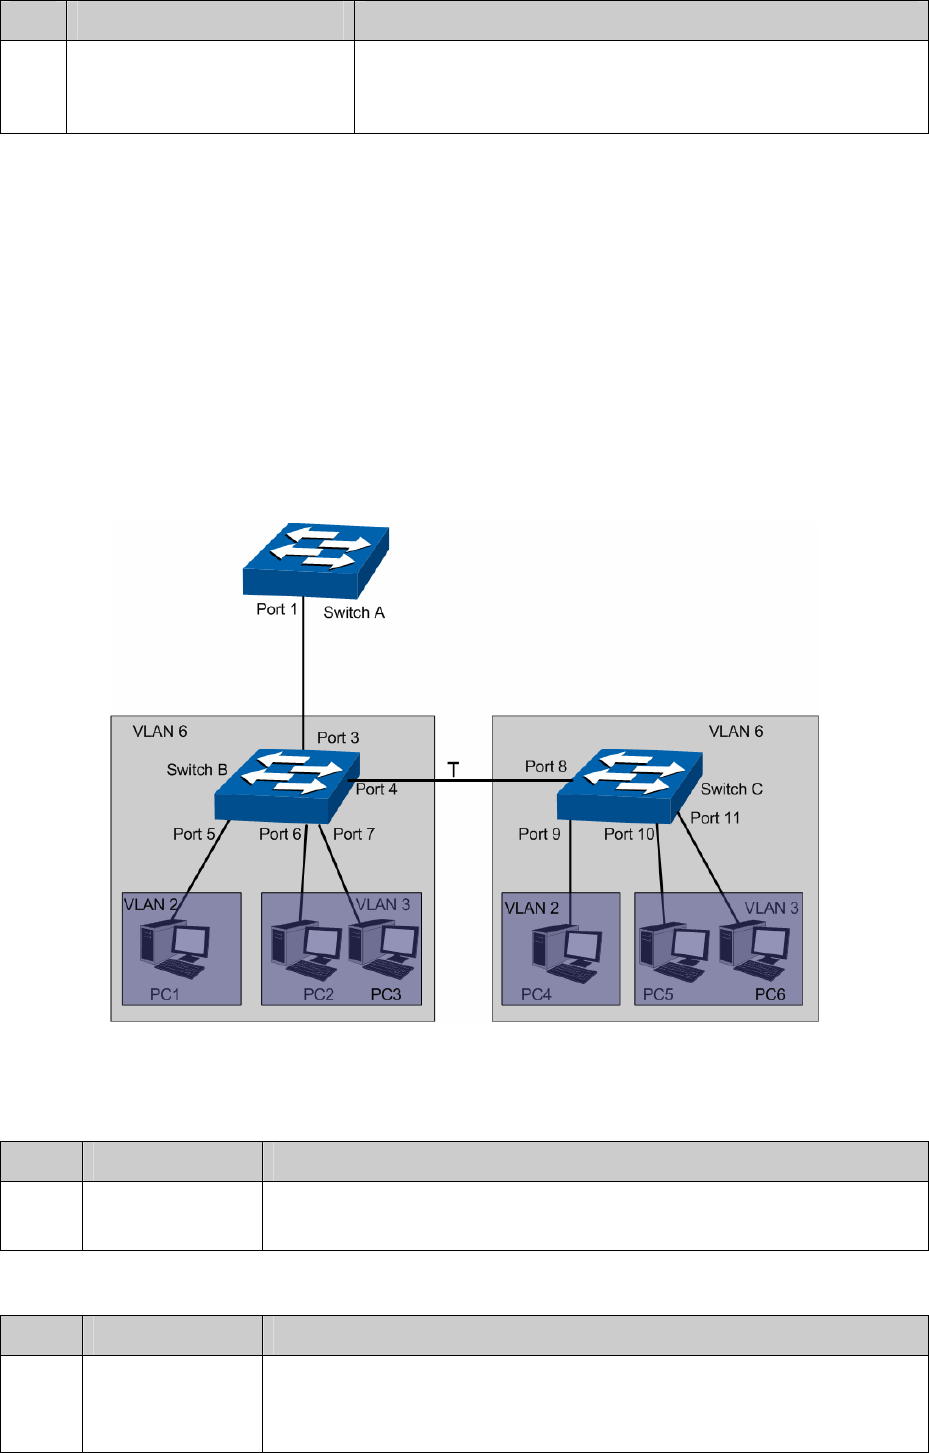
Network Requirements
Switch A is connecting to switch B, switch B is connecting to switch C;
Switch B is connecting to PC1, PC2 and PC3;
Switch C is connecting to PC4, PC5 and PC6;
PCs in different VLANs cannot communicate with each other;;
For switch A, packets from switch B and switch C have no VLAN tags. Switch A needs not to
consider the VLANs of switch B and switch C;
Network Diagram
Configuration Procedure
Configure switch A
Step Operation Description
1 Create VLAN6 Required. On VLAN→802.1Q VLAN→VLAN Config page, create a
VLAN with its VLAN ID as 6, owning Port 1.
Configure switch B
Step Operation Description
1 Create Private
VLANs.
Required. On the VLAN→Private VLAN→PVLAN Config page,
Enter the Primary VLAN 6 and Secondary VLAN 2-3, and then click
the Create button.
80


