XW Solar Charge Controller Installation
4–12 975-0239-01-01
Connecting the XW Solar Charge Controller to the Distribution Panel
To connect the XW Solar Charge Controller:
1. Connect the PV array’s positive (+) output to the PV array disconnect.
2. Route another (+) cable from the other end of the PV disconnect to the terminal
marked
PV + in the XW Solar Charge Controller.
3. Connect the PV array’s negative (–) output to the terminal marked
PV – in the XW
Solar Charge Controller.
4. Connect a positive (+) cable from the terminal marked
BAT + to the battery disconnect.
5. Connect a second positive (+) cable to the other side of the battery disconnect and
connect to the positive (+) battery terminal.
6. Connect the negative (–) battery cable to the terminal marked
BAT – in the XW Solar
Charge Controller.
7. Torque the Charge Controller terminals as follows.
• 15 inch-pounds (1.7 Nm) for #14–10 AWG wire
• 18 inch-pounds (2.0 Nm) for #8 AWG wire
• 20 inch-pounds (2.2 Nm) for #6 AWG wire.
Be careful not to overtighten. Allow some slack on the cables within the controller and
secure the wiring with strain reliefs or cable clamps.
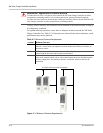
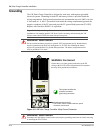
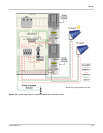
See Figure 4-8.
WARNING: Shock Hazard
Whenever a PV array is exposed to light, a shock hazard exists at the output wires or exposed
terminals. To reduce the risk of shock during installation, cover the array with an opaque (dark)
material before making the connections. PV arrays generate voltage whenever light strikes the
surface of the array. Before connecting the XW Solar Charge Controller, cover the array to prevent
any current from being generated.
WARNING: Shock Hazard
Do not connect the battery negative to ground. Bonding the battery negative to ground disables PV
ground-fault protection.


