


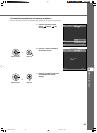

48
Setting up the DPX-1100
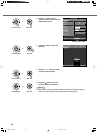
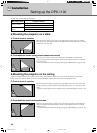
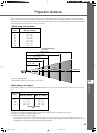
◆ Mounting the projector on a table
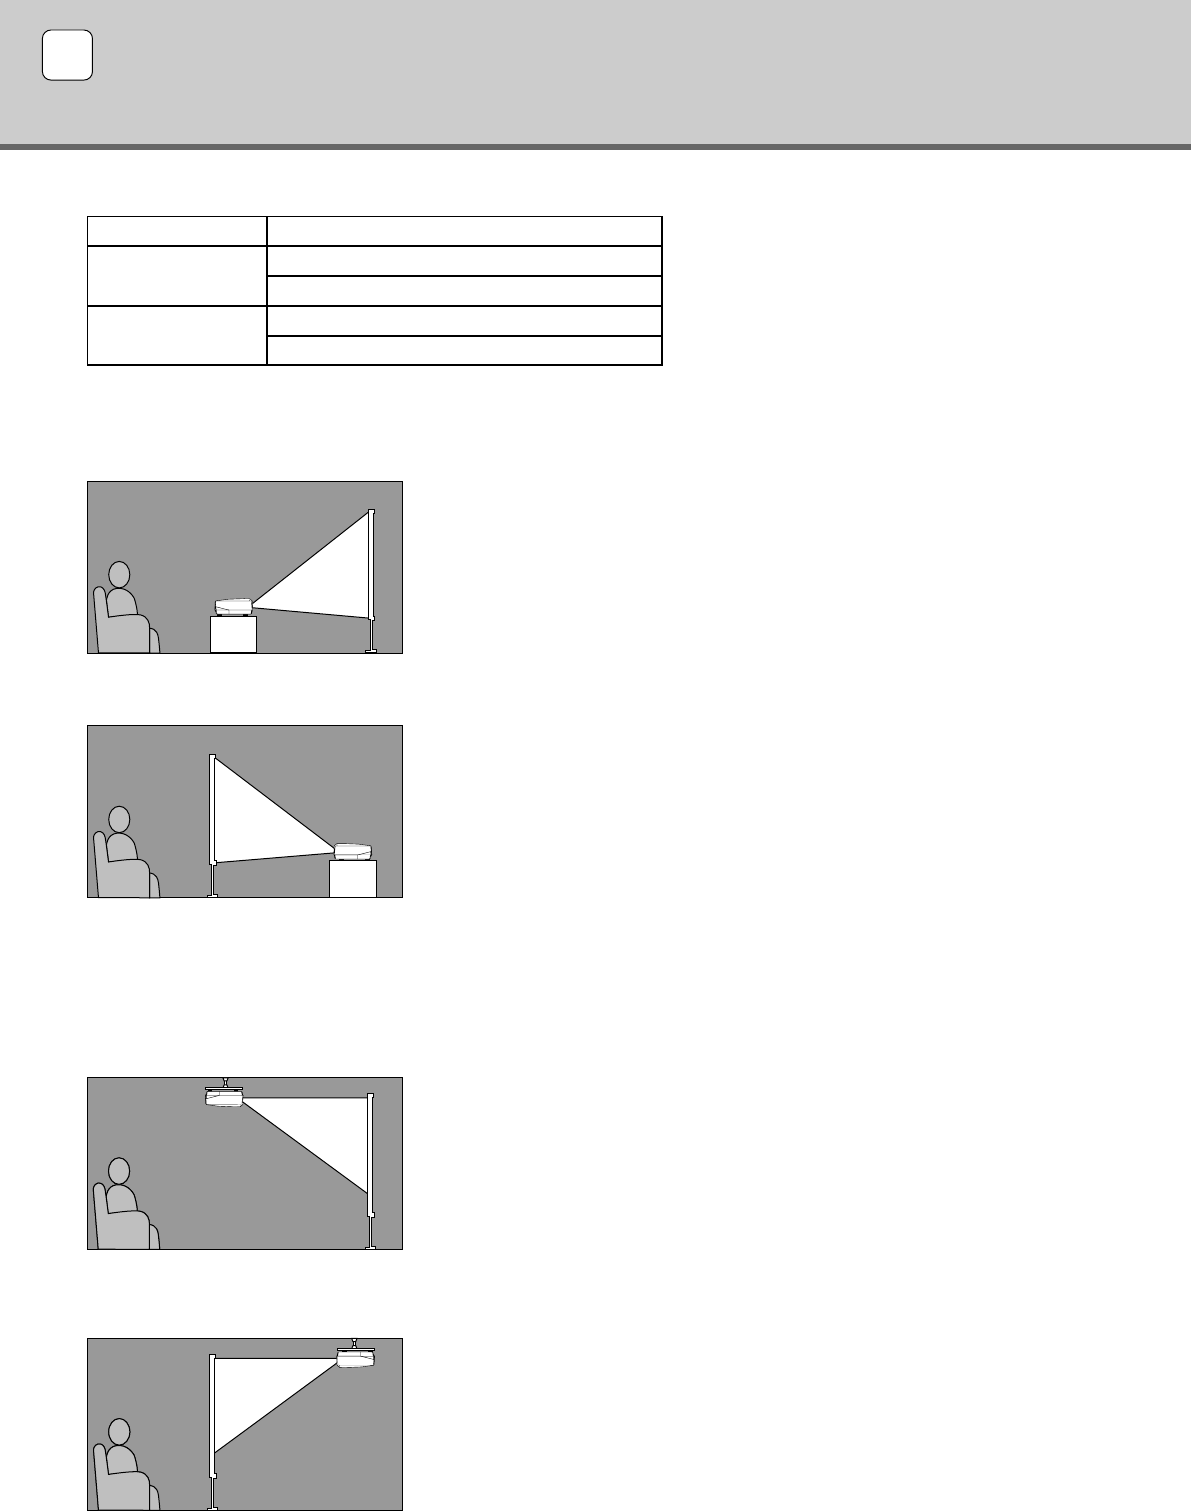
A: From in front of a screen
Place the unit on a table to project and view the image from in front of the screen. Usually,
place the unit on a reasonably high table. The height from the bottom of the unit to the center
of the lens is 12.4cm (4”-7/8).
B: From behind a screen (using a semi-translucent screen)
Place the unit on a table to project and view the image from behind a semi-translucent
screen. The distance between the projector and the screen should be the same as “A: From in
front of the screen”.
• Set the [Location] menu item in the [Setup] menu group to [Rear/Table]. (☞ page 22 - 40)
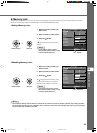
◆ Mounting the projector on the ceiling
There are two kinds of brackets (low ceiling and high ceiling, sold separately), which you can use to mount the projector on the ceiling.
Please consult your dealer for details on their use, and have installation done by either your dealer or a reputable contractor.
C: From in front of a screen
Mount the unit on the ceiling to project and view the image from in front of the screen. The
distance between the projector and the screen should be the same as “A: From in front of the
screen”.
•
Set the [Location] menu item in the [Setup] menu group to [Front/Ceiling]. (☞ page 22 - 40)
D: From behind a semi-translucent screen
Mount the unit on the ceiling to project and view the image from behind a semi-translucent
screen. The distance between the projector and the screen should be the same as “B: From
behind a screen”.
•
Set the [Location] menu item in the [Setup] menu group to [Rear/Ceiling]. (☞ page 22 - 40)
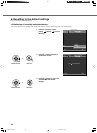
There are four ways of mounting the projector.
10
Installation
Mounting method
Placed on a table
Mounted on the
ceiling
Projection method
A: From in front of a screen
C: From in front of a screen
B: From behind a semi-translucent screen
D: From behind a semi-translucent screen
14_DPX-1100_E.p65 2004.04.16, 13:0048