


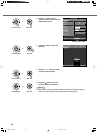

50
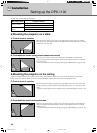
Follow the instructions to adjust the position of the projected image on screen.
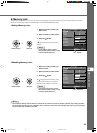
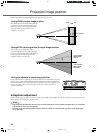
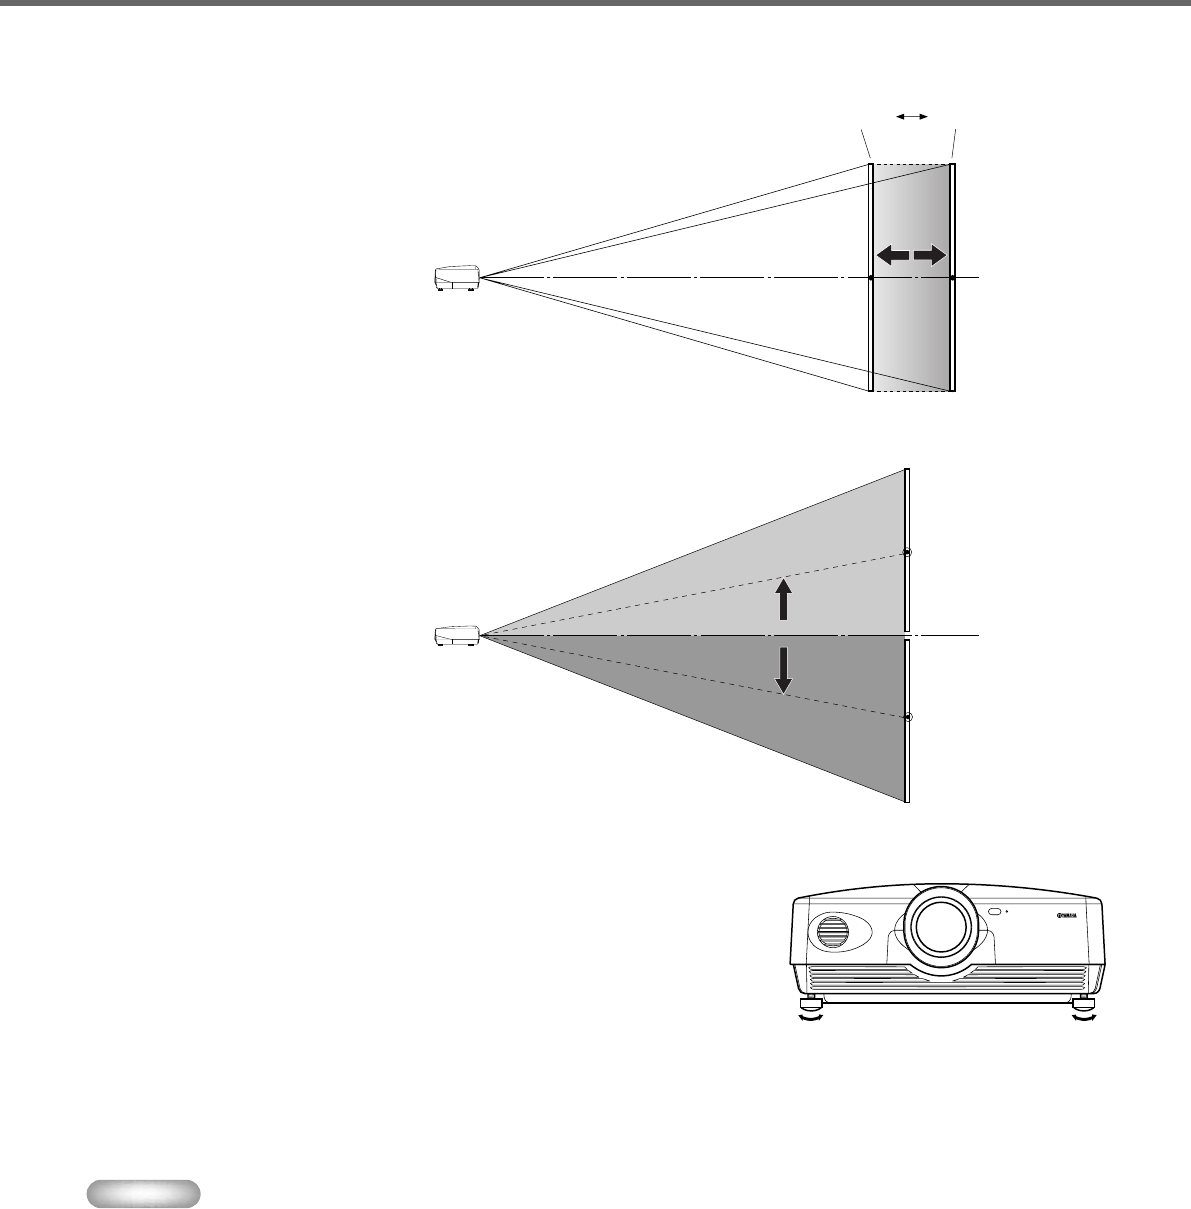
<Using ZOOM to adjust image position>
This illustration shows the limits within which the
zoom function can alter projection distance [a] in
relation to screen size. You can adjust the image
within these limits so that it fills the screen
completely. ( ☞ page 21)
<Using V.POS (vertical position) to adjust image position>
You can adjust the vertical position of the
projection image up or down by half of the height
of the screen. For example, shifting V.POS fully up
brings the lower limit of the image above the
centerline of the lens. (☞ page 20)
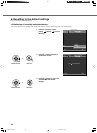
<Using the adjusters to adjust image position>
If you mount this unit on a tabletop, you can use the adjusters on its underside to change the
position of the projection image. Rotate the movable part of the two screw-type adjusters at
the front bottom of the case to adjust the height. The movement range of the adjusters is 3cm
(1-1/4 inch). Adjust with care as loosening them further than 3cm may cause them to
separate from the unit.
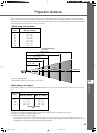
Projection image position
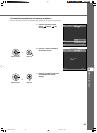
◆ Keystone adjustment
If you mount the unit at an angle to the screen, it projects trapezoidally distorted images. You can use the [keystone Correction] item in the
[Setup] menu group to rectify this. (☞ page 22-34)
Memo
• If the keystone is adjusted aspect ratio may not be correctly maintained. To correctly maintain the aspect ratio, try to use the DPX-
1100 with the lens shift in the center position.
• The video may be disturbed by keystone correction. Wherever possible, we recommend setting up so the screen and projector
form a right angle.
Wide Tele
Lens centerline
Lens centerline
(When shifted
fully up)
Lens centerline
(When shifted
fully down)
14_DPX-1100_E.p65 2004.04.16, 13:0050