4
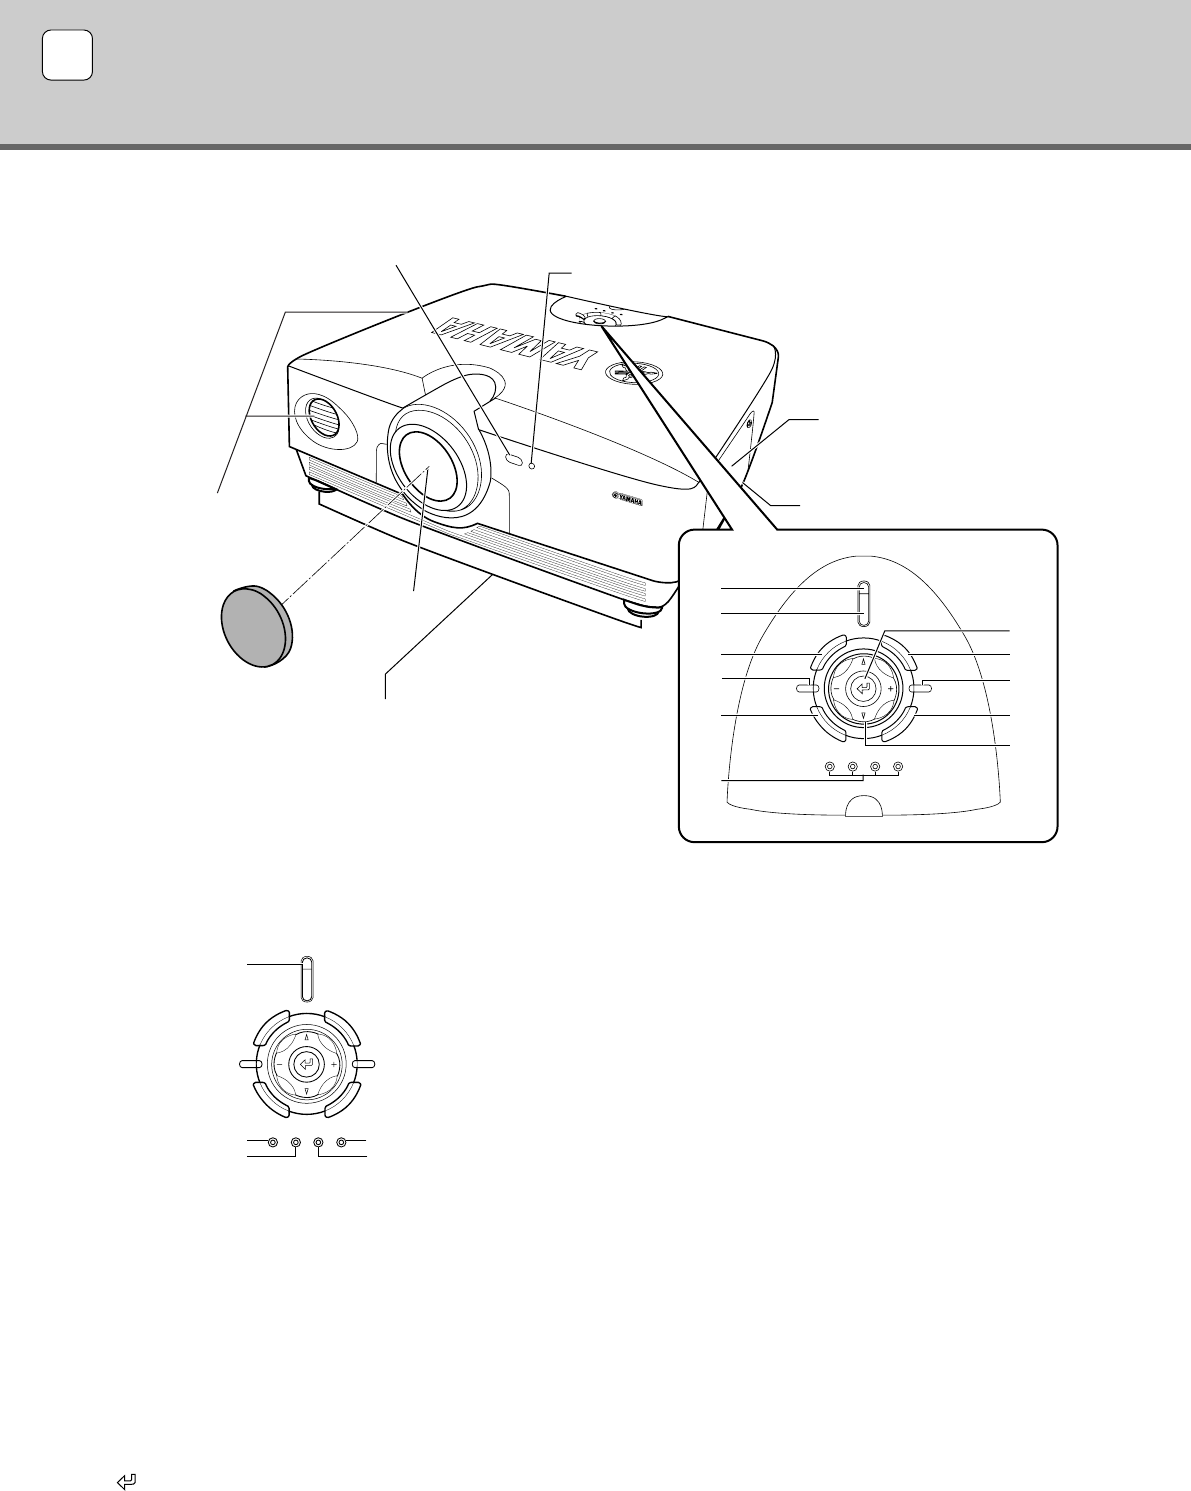
◆Main unit <Front panel and controls>
STANDBY
/
ON
SETTING
LAMP COVER TEMP FAN
PATTERN
ESCAPE
MENU
INPUT
DIGITAL CINEMA PROJECTOR DPX-1100
ASPECT
1
2
3
4
5
1
6
7
8
9
0
STANDBY
/
ON
SETTING
LAMP COVER TEMP FAN
PATTERN
ESCAPE
MENU
INPUT
ASPECT
A
E
B
CD
2 STANDBY/ON button
Switches the unit between Standby and On (operational)
modes.
3 ESCAPE button
Exits from submenus.
4 PATTERN button
Switches the built-in test pattern on and off.
5 ASPECT button
Turns the display aspect menu for the project image on and off.
6 (Enter) button
Sets values when the DPX-1100 is displaying the menu. When
the menu is not displayed, the DPX-1100 displays the in-line
image quality adjustment menu. (☞ page 40)
1 LED Indicators
The main unit is equipped with 5 indicators to display various states of operation. See page 59 for explanations of the LED indicator
meanings.
7 MENU button
Switches the settings and adjustments menu display on and off.
8 SETTING button
Selects lens adjustment modes.
9 INPUT button
Switches the input signal selection menu display on and off.
0 Cursor buttons
Use the h, g, +, - buttons for system operations, menu item
selection, and changing system values.
A STANDBY/ON indicator
(There is also an LED on the front panel of the main unit.)
B LAMP warning indicator
C COVER warning indicator
D TEMP warning indicator
E FAN warning indicator
Lamp cover
Ventilation inlet
Adjustable feet
Makes small adjustments to
the projection angle
Lens
Lens cap
Exhaust vent
Front remote control sensor
STANDBY/ON indicator
3 Controls and functions
11_DPX-1100_E.p65 2004.04.16, 12:544


