63-12
Cisco ASA 5500 Series Configuration Guide using ASDM
Chapter 63 Configuring the ASA CX Module
Configuring the ASA CX Module
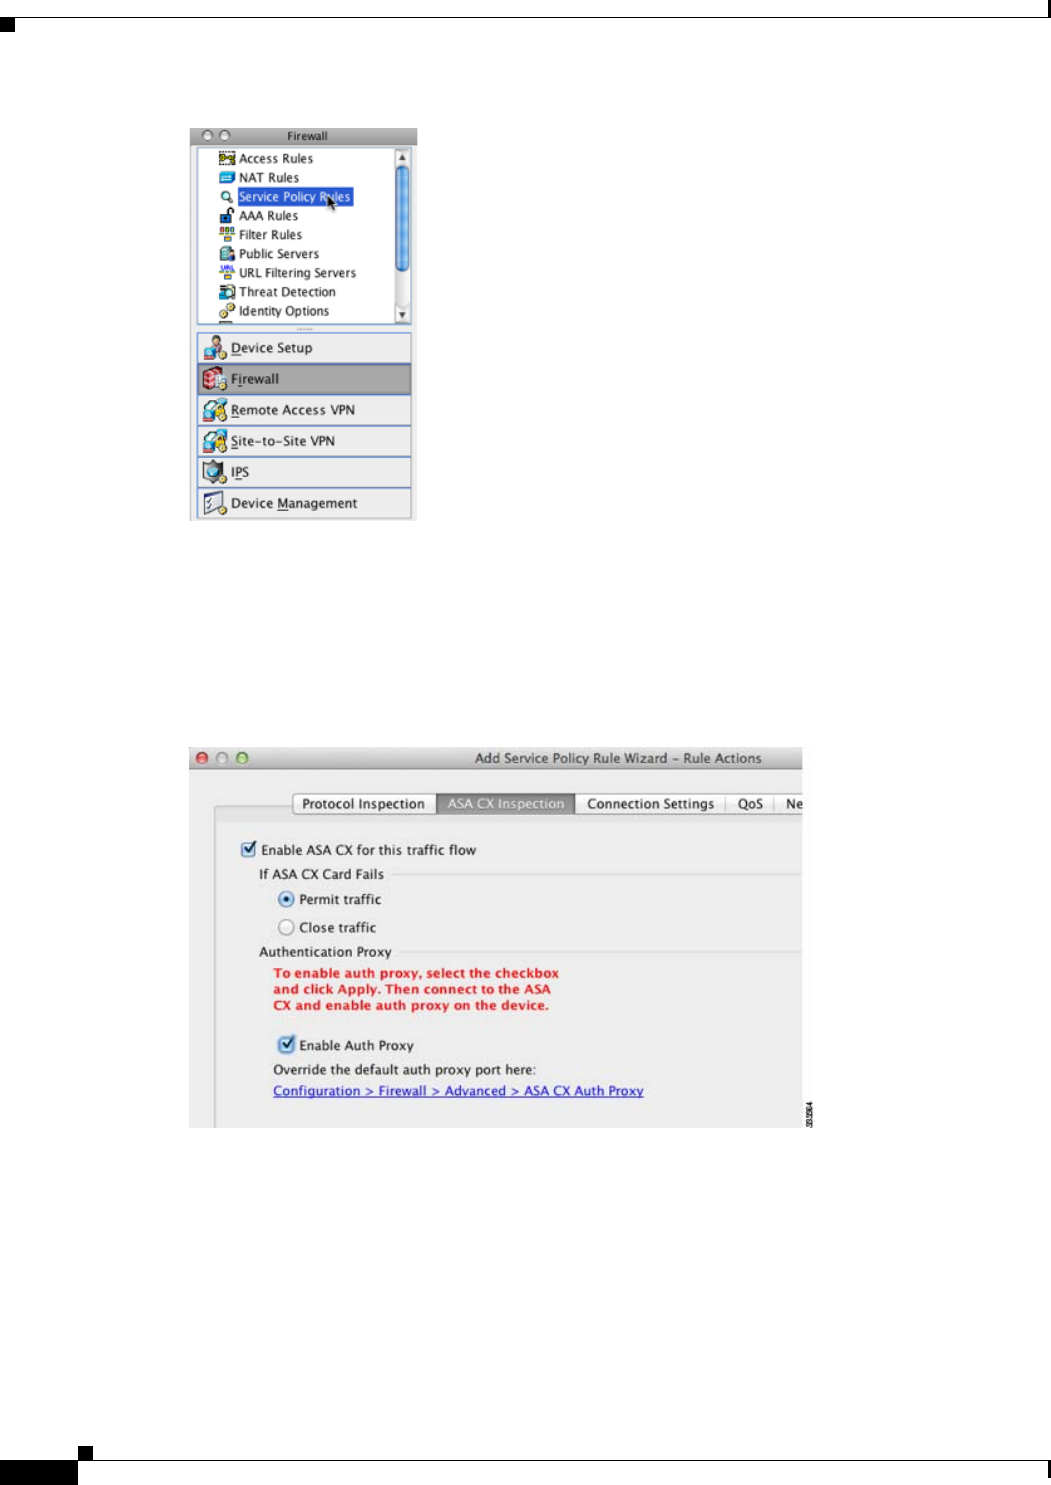
Step 2 Choose Add > Add Service Policy Rule. The Add Service Policy Rule Wizard - Service Policy dialog
box appears.
Step 3 Complete the Service Policy dialog box, and then the Traffic Classification Criteria dialog box as
desired. See the ASDM online help for more information about these screens.
Step 4 Click Next to show the Add Service Policy Rule Wizard - Rule Actions dialog box.
Step 5 Click the ASA CX Inspection tab.
Step 6 Check the Enable ASA CX for this traffic flow check box.
Step 7 In the If ASA CX Card Fails area, click Permit traffic or Close traffic. The Close traffic option sets the
ASA to block all traffic if the ASA CX module is unavailable. The Permit traffic option sets the ASA to
allow all traffic through, uninspected, if the ASA CX module is unavailable.
Step 8 To enable the authentication proxy, which is required for active authentication, check the Enable Auth
Proxy check box.
Step 9 Click OK and then Apply.


