


24 CHAPTER 3: INSTALLING THE ROUTER
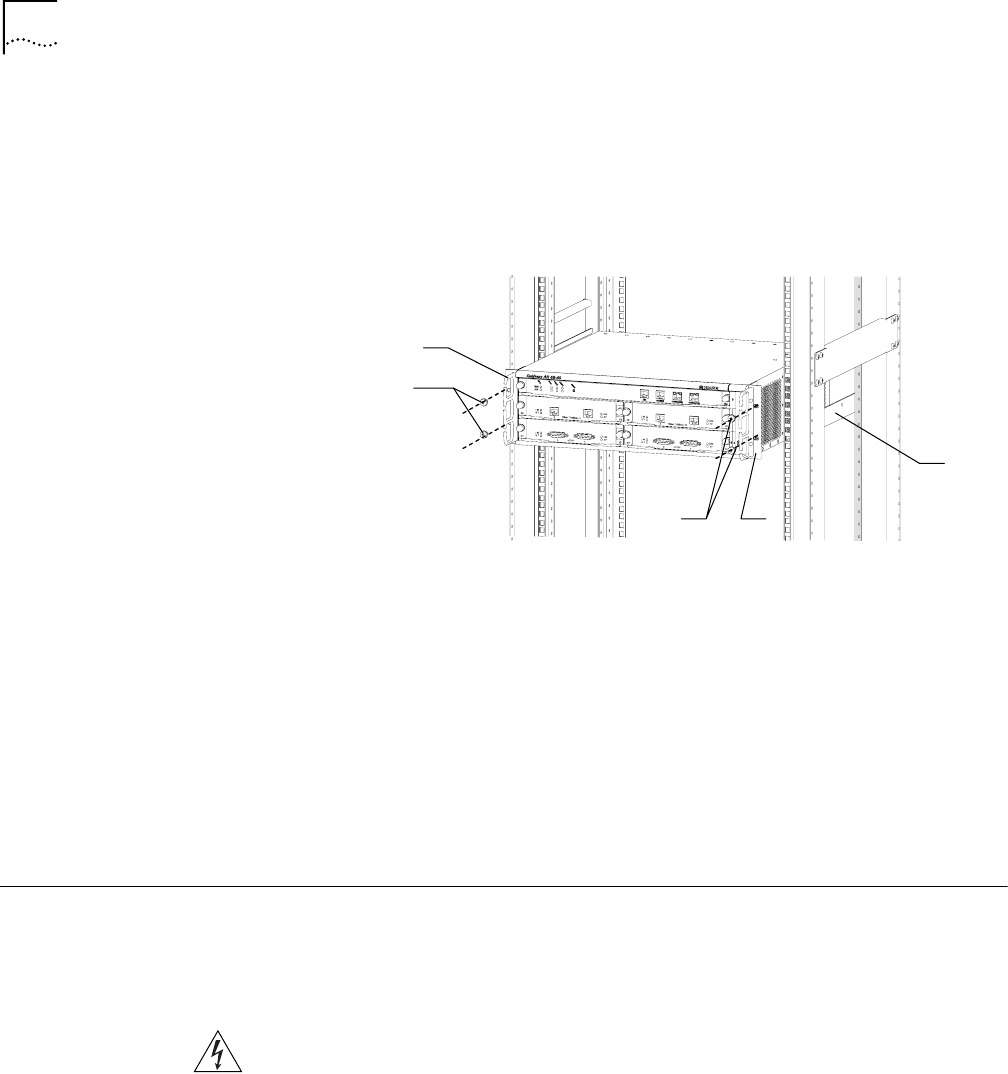
4 Place the Router in the rack by fixing the mounting brackets and the proper pan
head screws.
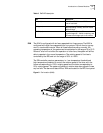
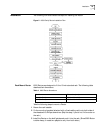
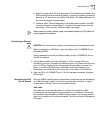
Figure 3 Mounting a 6000 Router in a rack
Bench-Mount Router In some cases, 19-inch standard rack is not available and bench mounting is
preferred. This mounting method is simple. Please pay attention to the following
items:
■ Keep the workbench stable and well grounded.
■ Leave the clearance of 10cm around the Router for heat dissipation.
■ Never put heavy things on the Router.
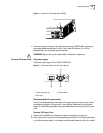
Installing Modules The tasks of general module installation include the installations of RPU, PWR, and
various FICs.
Connect the Ground
(PGND)
WARNING: The normal connection of PGND wire for the Router is the essential
safeguard against the lightning shocks and interference. Therefore, you must first
correctly connect the PGND wire when installing and using the Router.
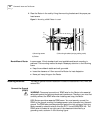
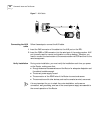
6000 Routers provide a separate PGND screw. You must securely connect the
PGND to the ground, ensuring the leakage power to be channeled into the earth
ground. The PGND also provides protection against the high voltage of lightning
shocks caused by external network lines like E1/T1 line and ISDN/PSTN line. The
PGND screw is located at top right-rear of the chassis and identified by a
grounding mark, as shown in the following figure:
(1)
(3)
(1)
(2)
(2)
1) Mounting screws 2) Mounting brackets (carrying cabling racks)
3) Guides