


Connecting the 3CXE589ET CardBus PC Card with XJACK Connector
1-5
Connecting the 3CXE589ET CardBus PC Card with XJACK
Connector
1 Remove all PC Cards from your notebook and turn
it on.
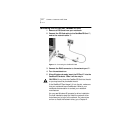
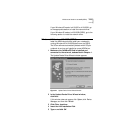
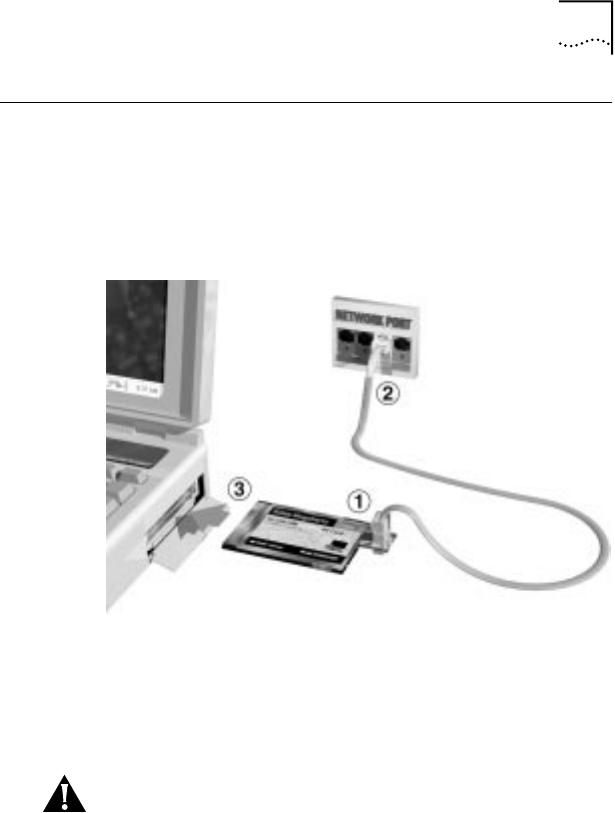
2 Connect the network cable
➀
to the CardBus PC Card
XJACK connector.
Figure 1-3
Connecting the CardBus PC Card
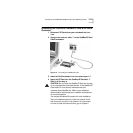
3 Insert the RJ-45 connector into the network port
➁
.
4 Insert the PC Card into the CardBus PC Card slot
➂
.
Slide it all the way in.
CAUTION:
Do not force the CardBus PC Card into the slot
or you may bend the pins inside the slot. If the CardBus PC
Card doesn’t fit into the slot, make sure that your
notebook has a CardBus slot. Refer to your notebook
documentation and contact your notebook manufacturer
for more information.
You may see Windows 95 prompts for driver installation.
The final installation step is to install the network driver
that allows you to login to the network. For instructions
on how to install the network driver, go to Chapter 2.