


2-4 CHAPTER 2: INSTALLING THE NETWORK DRIVER
6 In the Update Device Driver Wizard, click Finish.
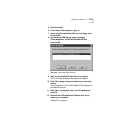
7 In the Insert Disk window, click OK.
8 In the copying files window, type a: and click OK.
9 If prompted, insert the Windows 95 CD-ROM or type
the directory path to the Windows 95 CAB files on
your notebook and click OK.
10 Remove the LAN Installation Disk and restart the
notebook.
The network driver installation is complete. To confirm
installation, see the section “Confirming Installation.”
If you have problems, go to Chapter 3.
Windows 95 (Versions 4.00.950 and 4.00.950A)
You install the NDIS network driver when your notebook is
running Windows 95. This driver can be used in Microsoft
and NetWare environments.
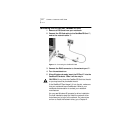
1 Make sure the CardBus PC Card is inserted and
connected to the network, as described in Chapter 1.
2 Double-click My Computer, Control Panel, and then
double-click Add New Hardware.
3 In the Add New Hardware Wizard window, click Next.
4 Respond to the “Do you want Windows to search for
your new hardware” prompt by clicking “No” and
then click Next.
5 Double-click on Network Adapters in the list that
appears.
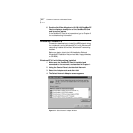
6 In the Select Device window, click the Have Disk button.
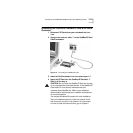
7 Insert the LAN Installation Disk in the floppy drive
and click OK.
8 Select 3Com Megahertz 10/100 LAN CardBus PC Card
Manual Load and click OK to copy the CardBus PC
Card files to your notebook.
9 In the New Hardware Wizard Window, click Next.