


Windows 95 (Versions 4.00.950 and 4.00.950A) 2-5
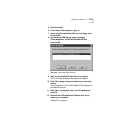
10 Click Finish to complete the driver installation and
remove the LAN Installation Disk.
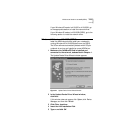
a If the software prompts for Computer Name and Work
Group Name, type the names as supplied by your MIS
department and click OK.
■ The computer name is the name of your notebook.
Give your notebook a unique name (up to 15
characters, no blank spaces).
■ A workgroup is composed of the computers that you
usually communicate with (like your department) and
contains shared resources (like printers).
■ If you use peer group networking, the workgroup
name is your peer group. Peers can see each other
when they look in the Network Neighborhood.
■ Your computer description is visible to other members
of your workgroup when they see your notebook in
the Network Neighborhood.
11 If you are prompted for Windows 95 files, enter the
directory path for Windows 95 CAB files or insert the
Windows 95 CD-ROM.
When installation is complete, Windows 95 prompts for
restart.
12 Remove the LAN Installation Disk and click Yes to
restart the notebook to complete driver installation.
Confirming Installation
1 Double-click the My Computer icon.
2 Double-click the Control Panel icon.
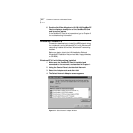
3 Double-click the System icon.
The System Properties box appears, detailing your notebook
setup.
4 Click the Device Manager tab.
A list of devices appears, arranged by type.
5 Double-click the Network Adapters icon.
The name of the installed CardBus PC Card appears:
3Com Megahertz 10/100 LAN CardBus PC Card
Manual Load