


ASUS P5MT-MASUS P5MT-M
ASUS P5MT-MASUS P5MT-M
ASUS P5MT-M
5-95-9
5-95-9
5-9
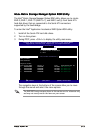
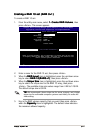
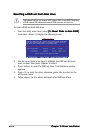
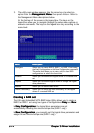
4. The Disks item is highlighted, press <Enter> to select the hard disk
drives to configure as RAID. The following pop-up screen appears.
[ SELECT DISKS ]
[
↑↓↑↓
↑↓↑↓
↑↓]-Previous/Next [SPACE]-Selects [ENTER]-Selection Complete
Port Drive Model Serial # Size Status
0 XXXXXXXXXXXX XXXXXXXX XX.XGB Non-RAID Disk
1 XXXXXXXXXXXX XXXXXXXX XX.XGB Non-RAID Disk
2 XXXXXXXXXXXX XXXXXXXX XX.XGB Non-RAID Disk
3 XXXXXXXXXXXX XXXXXXXX XX.XGB Non-RAID Disk
Select 2 to 4 disks to use in creating the volume.
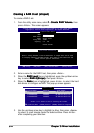
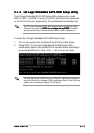
5. Use the up/down arrow key to highlight the drive you want to set,
then press <Space> to select. A small triangle marks the selected
drive. Press <Enter> after completing your selection.
6. When the
Stripe Size Stripe Size
Stripe Size Stripe Size
Stripe Size item is highlighted, press the up/down arrow
key to select the stripe size for the RAID 5 array, then press <Enter>.
The available stripe size values range from 4 KB to 128 KB. The
default stripe size is 64 KB.
TIP: TIP:
TIP: TIP:
TIP: We recommend a lower stripe size for server systems, and a higher
stripe size for multimedia computer systems used mainly for audio and
video editing.
7. Key in the RAID volume capacity that you want, then press <Enter>
when the
Capacity Capacity
Capacity Capacity
Capacity item is highlighted. The default value indicates
the maximum allowed capacity.
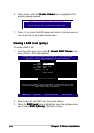
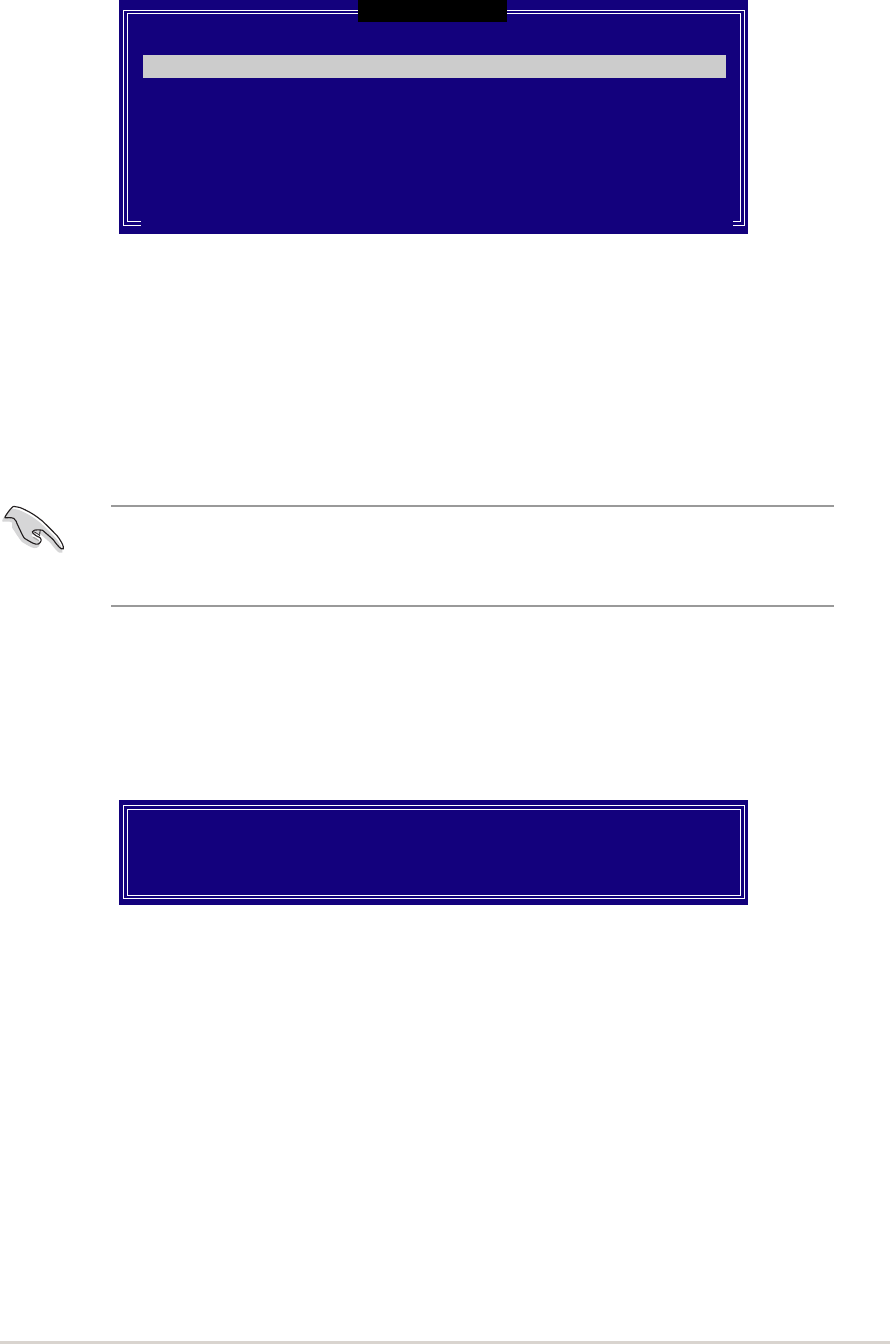
8. Press <Enter> when the
Create VolumeCreate Volume
Create VolumeCreate Volume
Create Volume item is highlighted. This
warning message appears.
WARNING: ALL DATA ON SELECTED DISKS WILL BE LOST.
Are you sure you want to create this volume? (Y/N):
9. Press <Y> to create the RAID volume and return to the main menu or
<N> to go back to the Create Volume menu.