


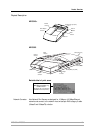


Basic Installation
AXIS 540+/AXIS 560 17
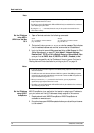
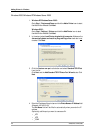
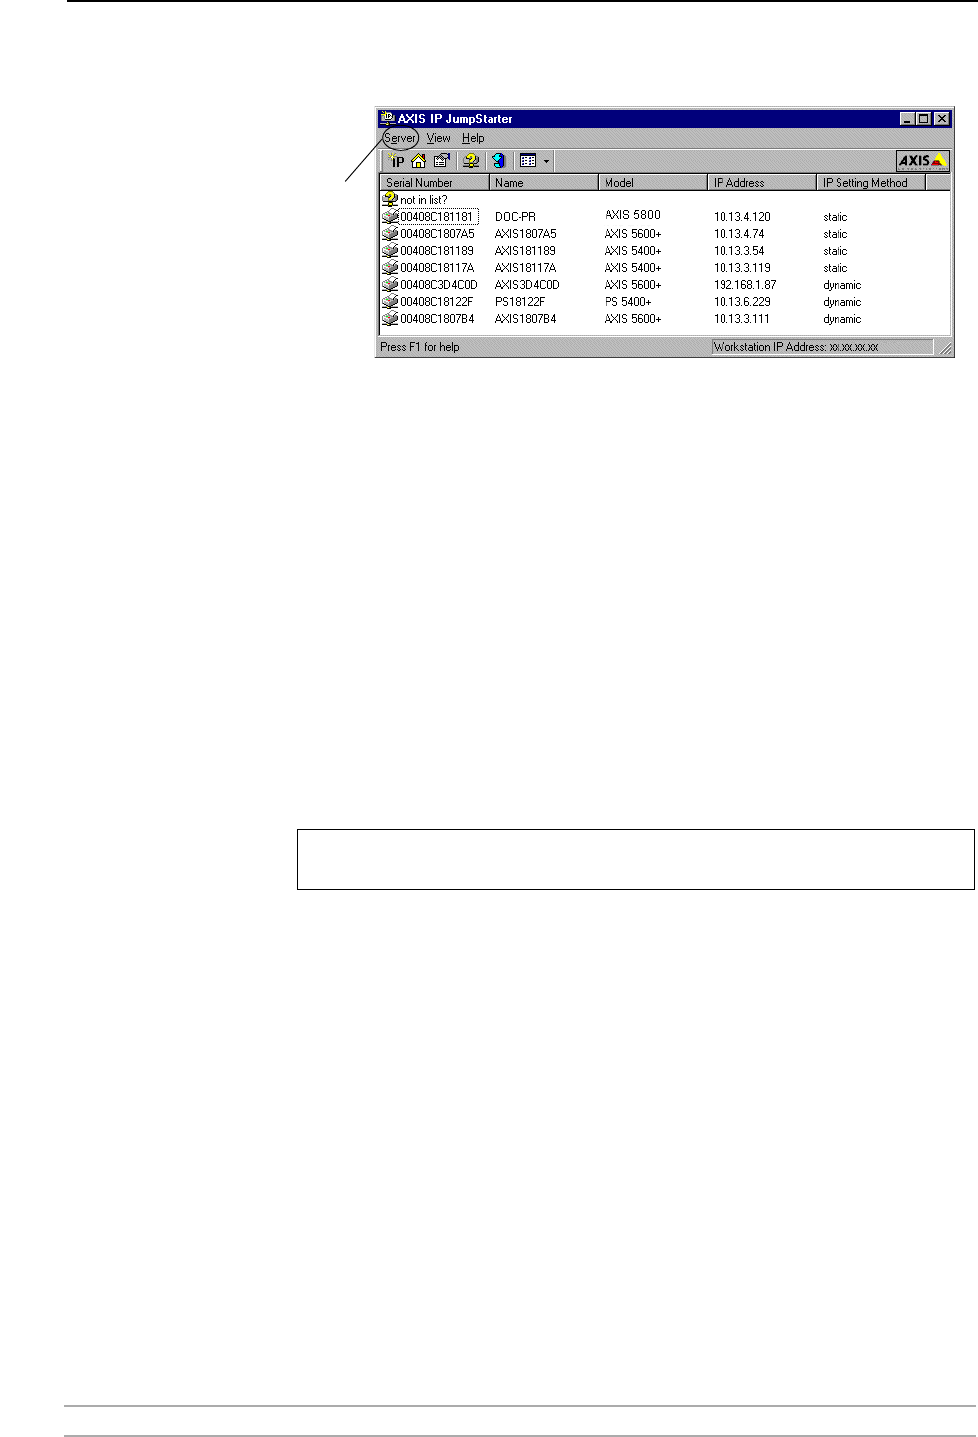
3. The software will scan your network for attached print servers. Select a print
server from the serial number list:
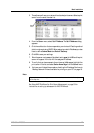
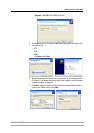
4. From the Server menu, select Set IP Address. The Set IP Address dialog
appears.
5. Click the radio button that corresponds to your choice of IP setting method
(static or dynamic using DHCP). When assigning a static IP address you also
have to define Subnet Mask and Default Gateway.
6. Click OK to save your settings.
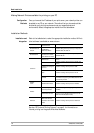
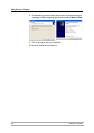
7. Enter the server root password (by default set to pass), click OK and the print
server will appear in the list with the assigned IP address.
8. To verify that you have access to the print server’s Web pages, highlight the
print server in the list and select Server Home Page from the Server menu.
9. You have now finished the procedure of setting the IP address. Continue to
“Making Network Printers available for printing on your PC” on page 18.
Note:
See Using AXIS ThinWizard for Print Server Management, on page 83 for
instructions on setting ip addresses with AXIS ThinWizard.
Server
menu
If your print server does not appear in the serial number list, refer to the AXIS IP JumpStarter
online help files.