


Management and Configuration
AXIS 540+/AXIS 560 87
Viewing
the Account File
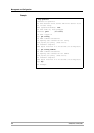
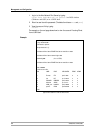
The account file contains data concerning the ten last print jobs. It specifies an
internal job number, the user that initiated the job, the protocol and logical
printer that was used, current status (Completed, Off-line, or Printing), number
of bytes printed, elapsed time and off- line time.
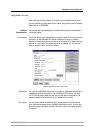
Follow the instructions below to view the account file using FTP:
1. Log in to the Axis Network Print Server by typing:
ftp <host name> or ftp <IP address> in a DOS windows (Windows
and OS/2) or in a UNIX shell.
2. Enter the user id and the password. (The default entries are
root and pass.)
3. Download the account file to your host by typing:
get account
4. View the account file using your preferred text editor.
Viewing
the Status File
The status command shows which printer port the logical printers are assigned
to, and their current status.
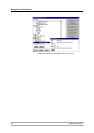
Follow the instructions below to view the status file using FTP:
1. Log in to the Axis Network Print Server by typing:
ftp <host name> or ftp <IP address> in a DOS windows (Windows
and OS/2) or in a UNIX shell.
2. Enter the user id and the password. (The default entries are
root and pass.)
3. Download the status file to your host by typing:
get status
4. View the status file using your preferred text editor.
FTP Help By typing
help in step 3 in the FTP instruction sets above, a list of all available
files and commands will be displayed.
Using Telnet
Having assigned an IP address to your Axis Network Print Server, as described in
Assign an IP Address to the Print Server, on page 13, you can manage your Axis
Network Print Server using the Telnet protocol.
Viewing
the Account File
The account file contains data concerning the last ten print jobs. It specifies an
internal job number, the user that initiated the job, the protocol and logical
printer that was used, current status (Completed, Off-line, or Printing), number
of bytes printed, elapsed time and off- line time.
Follow the instructions below to view the account file using telnet: