


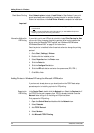

Adding Printers in Windows
24 AXIS 540+/AXIS 560
Client/Server Printing Select Network printer instead of Local Printer in Step 2 above if your print
server has already been installed by the administrator on another computer.
Follow the instructions in the Add Printer Wizard to complete the installation.
Important!
Alternative Method for
LPR Printing
If you wish to print over LPR but do not wish to install Print Services for Unix
you can do this by changing the printing protocol after having installed the
printer using the Standard TCP/IP method, see “Windows 2000/Windows
XP/Windows Server 2003” on page 20 for instructions.
Once the printer is installed, follow these instructions to change the printing
protocol:
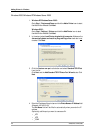
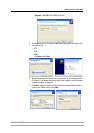
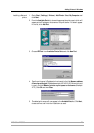
1. Go to Start | Settings | Printers.
2. Double-click the installed printer.
3. Select Properties from the Printer menu.
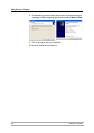
4. Click the Ports tab.
5. Click the Configure Port button.
6. Click the LPR radio button and enter the queue name (PR1, PR2...).
7. Click OK to finish.
Adding Printers in Windows NT4 using the Microsoft LPR Monitor
If you have not already done so, you should perform the TCP/IP basic setup
procedures prior to installing a printer for LPR printing.
Preparing for
LPR Printing
In the Control Panel, double-click the Network icon. Select the Services tab. If
the TCP/IP Printing entry appears, then TCP/IP is already installed. Close the
Network folder and go on to Installing an LPR printer, below.
First, prepare for LPR printing:
1. Open the Control Panel and double-click the Network icon.
2. Select Protocols.
3. Add TCP\IP Protocol.
4. Select Services.
5. Add Microsoft TCP\IP Printing.
• Make sure that the Automatically detect and install my Plug and Play printer checkbox
is not checked
• Press F1 to access the Windows online help system if you need additional help when
installing a printer/print server using this method.