Transferring label templates from the PC to the printer
43
IntroductionCreating Labels (For Windows)Creating Labels (For Macintosh)Appendix
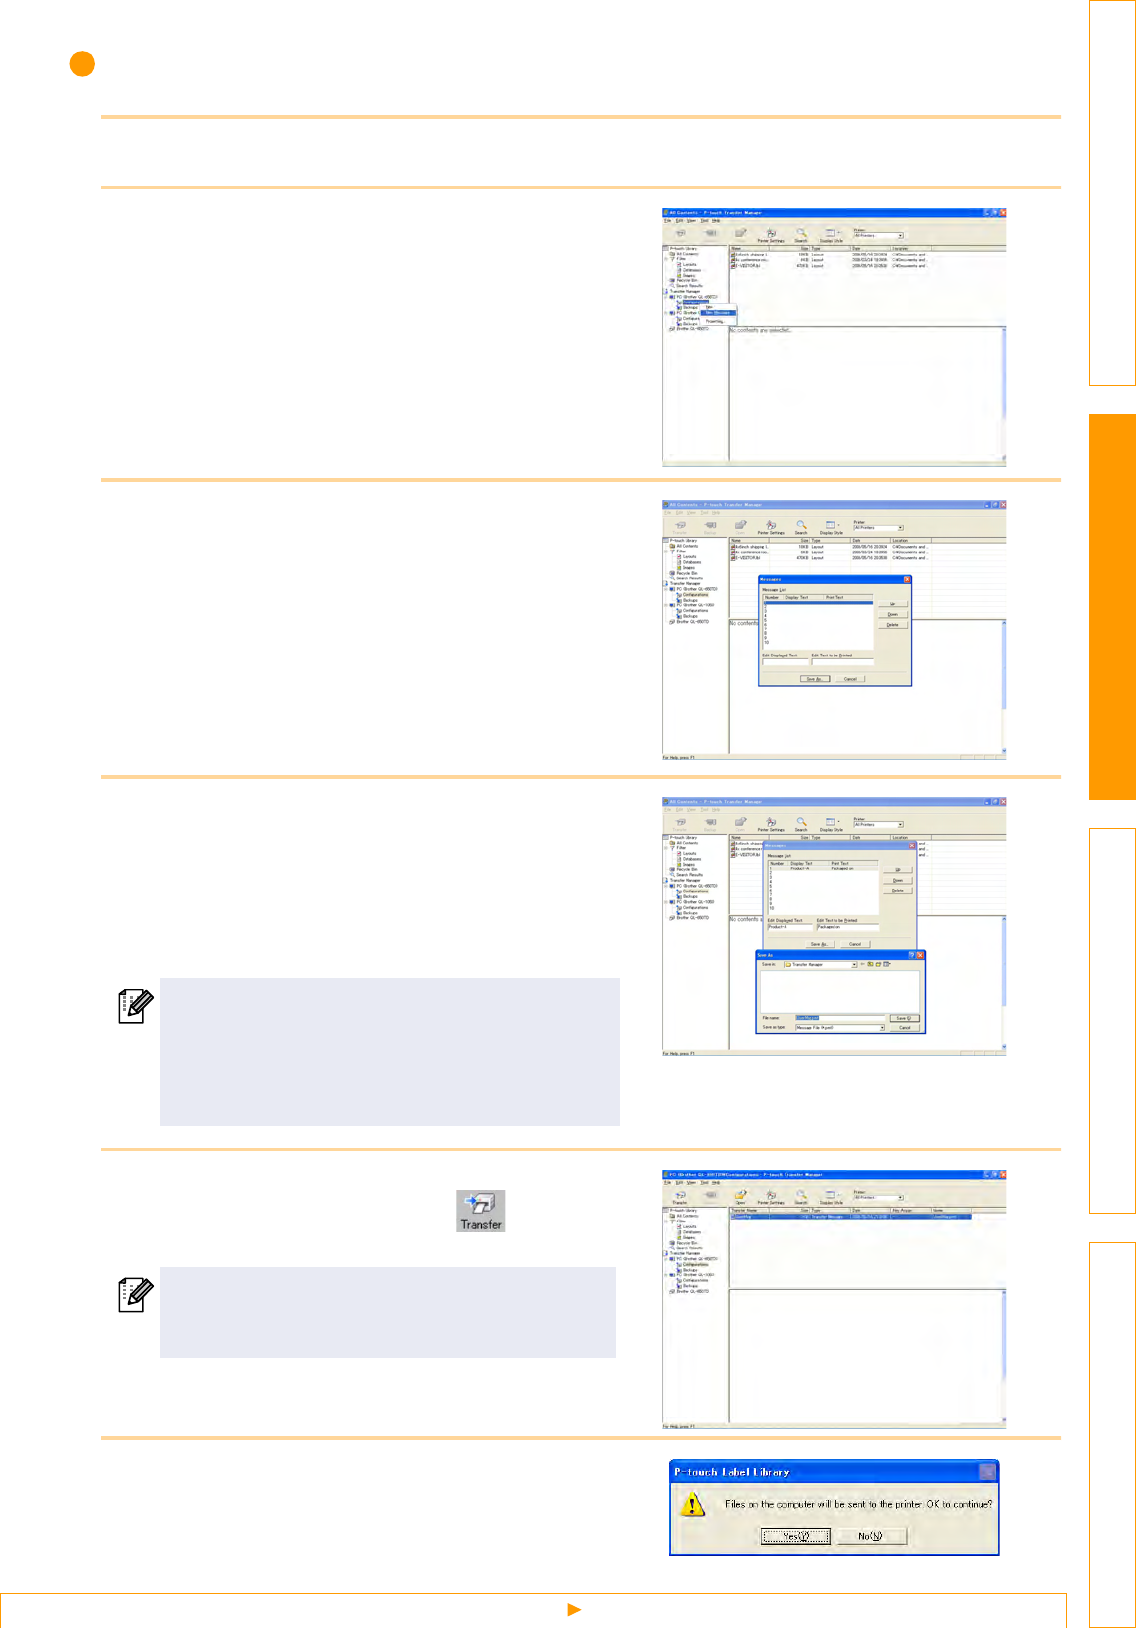
Creating and transferring a new message (QL-650TD only)
1 Select the QL-650TD Configurations folder or any folder under it.
2 Right click, then select [New Message].
The message file [Edit] dialog box is displayed.
3 Select the number for the message to
create or edit.
4 Input the display text and print text, then
click [Save As].
A screen is displayed for specifying where to
save the message file in the PC. Change storage
location or revise the message file name as
necessary.
5 Select the message text or its folder you
want to transfer, then click .
The transfer confirmation message is displayed.
6 Click [Yes].
The message data is transferred to the printer.
A maximum of 10 messages can be stored in the
message file. Only 1 message file can be sent to
1 unit of QL-650TD, so to correct a message,
double-click on the existing message file, open the
[Message] dialog box and make the correction.
Before transferring a message, check that the PC
and the printer are correctly connected with a
USB cable and that the printer power is On.


