49
CARE & TROUBLESHOOTING
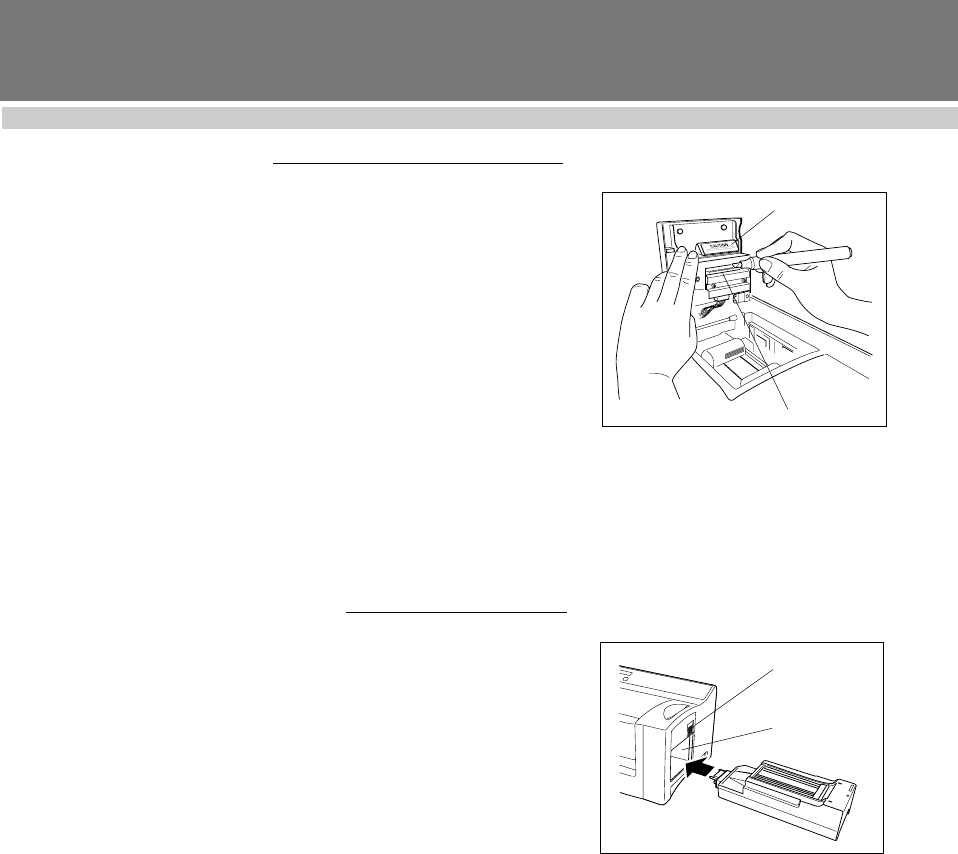
Cleaning the Print Heads
The print heads require cleaning whenever you change the ribbon cassette.
1 Turn off the machine.
2 Open the ink ribbon compartment cover.
3 Pull back on the print head cover.
• The print heads are located on the thin gold-colored plate and are not
visible to the naked eye.
4 Using a back-and-forth motion, use the print head cleaning pen (part
no. PRCLPEN) to clean along the print head.
☞ NOTE: Be careful not to touch the print head.
Keep the cap on the print head cleaning pen
when it is not being used.
5 Release the print head cover and close the ink ribbon compartment
cover.
6 Print again.
☞ NOTE: If the characters are still blurred, repeat the
above steps.
Replacing the xenon lamp unit
The xenon lamp has an approximate life of 2,000 flashes. The Stampcreator
Pro will automatically count the flashes. When the message “REPLACE Xe
UNIT” appears in the LCD, replace the xenon lamp unit even if the unit can
still flash.
1 Press the Mode button on the machine until the message “RESET
COUNTER: appears in the LCD.
2 Press the Set button to reset the xenon lamp counter.
3 Slide the xenon lamp unit release lever up and pull out the xenon lamp
(part no. PRLAMP).
4 Fully insert the new xenon lamp unit until it locks into place. Check that
“N = 0” appears in the LCD of the Stampcreator Pro.
5 Press the Set button on the Stampcreator Pro.
☞ NOTE: Mark the used xenon lamp unit to identify
the old one from the new one.
Do not touch the print heads.
Do not use cleaning devices other than the
print head cleaning pen and cleaning sheets
supplied with the Stampcreator Pro.
Print head cover
Print head
Xenon lamp unit
release lever
Xenon lamp unit
compartment


