


Installing the SEHI
SEHI User’s Guide 4-5
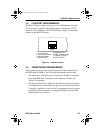
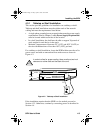
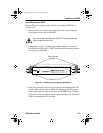
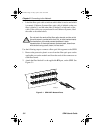
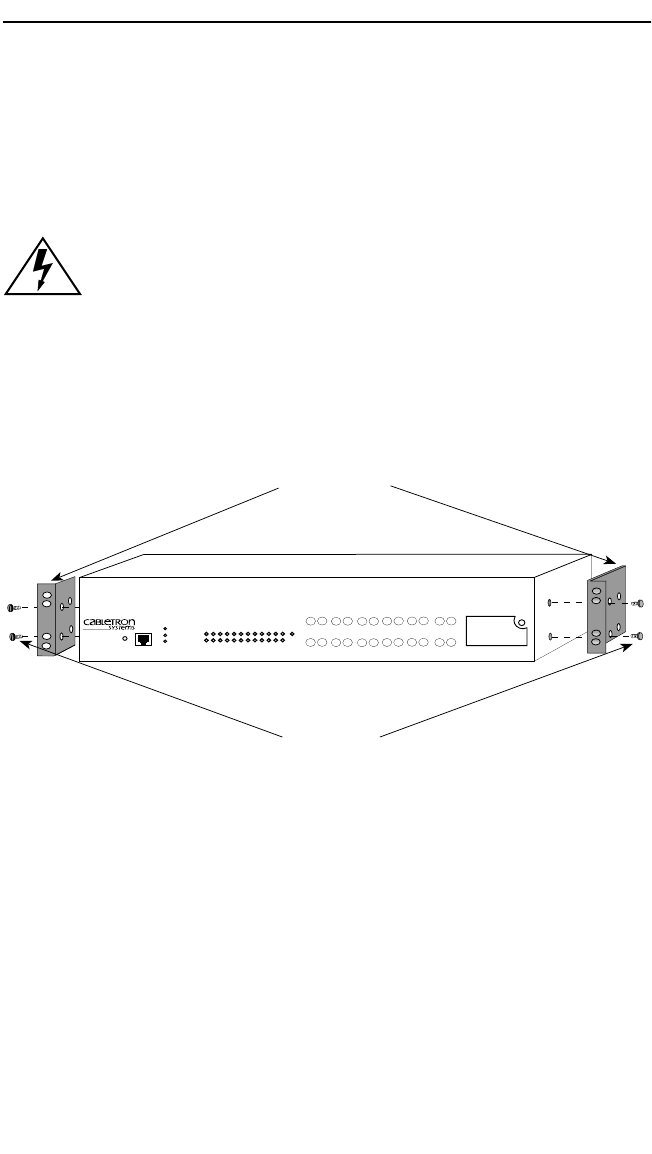
Rack Mounting the SEHI
Refer to Figure 4-4 and proceed as follows to install the SEHI into a
19-inch rack.
1. Remove four cover screws (two from each side) located along the
front edges of each side of the SEHI.
2. Using the four 6-32 x 3/8-inch replacement flathead cover screws
provided in the SEHI-ACCY-KIT, attach the rack mounting brackets
to each side of the SEHI.
Figure 4-4 Installing the Rack Mounting Brackets
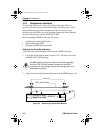
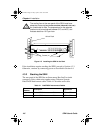
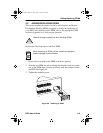
3. Ensure that the rack used will support the unit and that the rack will
remain stable with the unit installed in it. Support the SEH securely
from underneath and align the brackets of the SEH chassis with the
screw holes in the equipment rack as shown in Figure 4-5. Fasten the
SEH to the equipment rack securely.
Do not remove the cover from the SEHI. Do not remove any
other screws from the unit.
Screws (4)
Rack Mounting
Brackets (2)
0165205
HubSTACK
10BASE-FL HUB
WITH
LANVIEW
®
SECURE
SEHI-22FL
E
1
RCV
LNK
12 11 10 9 8 7 6 5 4 3 2 1
PWR
CPU
CLN
RX
TX
RX
TX
RX
TX
RX
TX
RX
TX
RX
TX
RX
TX
RX
TX
RX
TX
RX
TX
RX
TX
RX
TX
1
2
3
4
56
7
8
9
10
1112
EPIM 1
RESET
COM
SEHI Book Page 5 Friday, April 19, 1996 10:46 AM