


Scanning
8-6
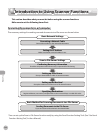
Basic Scanning Operations
Basic Scanning Operations
This section describes the basic procedures for scanning documents.
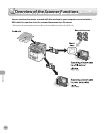
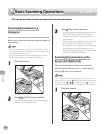
Scanning Documents to a
Computer
You can scan documents and transmit the scanned
data to your computer using the operation panel of
the machine.
Your machine must be connected via an USB cable and the
USB scanner driver must be loaded to scan. This machine does
not support network scanning.
Scanning speed may be slower when sending an e-mail or
scanning documents to a file server in B&W format.
1
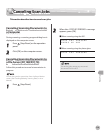
Place documents.
2
Press [SCAN] on the machine.
The SCAN indicator lights up and the machine
enters the scan standby mode.
–
–
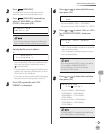
3
Press [Start] on the machine.
If you are asked to select a program to launch,
select “MF Toolbox Ver4.9.” The scanned
document will be processed according to
your settings.
When scanning is complete, a folder with the
scanning date will be created in the [My
Pictures] folder in the [My Documents] folder,
and your document will be saved in this
folder. (For Windows Vista/7, the folder will be
created in the [Pictures] folder.)
Scanning Documents to a File
Server (D1180/D1170)
This section describes the basic procedure for
sending scanned documents to a computer that
acts as a file server on a network.
You can specify the file server addresses only with one-touch
keys, coded dial codes, or [Address Book]. You cannot specify
a file server using – , [numeric keys] and
[Tone]. See
“Specifying Destinations (Scan to File Server),” in the e-Manual.
1
Place documents.
–
–