


Advanced Guide
> Printing Using the Operation Panel of the Machine > Printing Photographs Easily from a Memory Card/
USB Flash Drive (Photo) >
Using Useful Display Functions
> Printing a Specified Area (Trimming mode)
U015
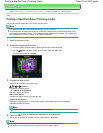
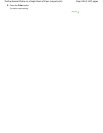
Printing a Specified Area (Trimming mode)
You can edit images displayed on the LCD by cropping them.
Note
The trimming mode cannot be available depending on the print menu.
Crop images after specifying the page size, media type, and bordered or borderless printing in the
print settings confirmation screen. If you change the paper settings after cropping, the cropped area
may be adjusted to match the paper, or be disabled completely.
1.
Select the photo to crop.
2.
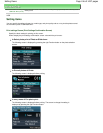
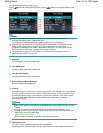
Display the cropping edit screen.
1.
Press the center Function button to display the Change view/mode screen.
2.
Use the
button to select Trimming mode, then press the
OK
button.
The Trimming screen is displayed.
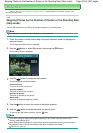
3.
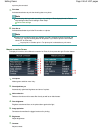
Choose the area to print.
Use the following buttons to crop the area.
,
,
, and
buttons:
Positions the cropping frame.
+
or
-
buttons, or Scroll Wheel:
Sets the cropping frame size.
Left Function button:
Changes the aspect ratio of the cropping frame.
Center Function button:
Rotates the cropping frame. To switch the cropping frame between portrait and landscape
orientations, press this button.
Note
Some buttons cannot be used depending on the print menu.
4.
Press the
OK
button to finalize your selection of cropping area.
The area to be cropped is specified, and the original photo is displayed.
Note
The cropped image cannot be newly saved on the memory card/USB flash drive.
The cropping area is displayed only for photos which have been cropped.
Page 421 of 1037 pagesPrinting a Specified Area (Trimming mode)