


(2)
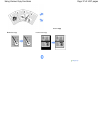
Select Scan
on the HOME screen.
See Selecting Menus on the HOME Screen.
If you have ever specified a computer for saving scanned data, go to (5).
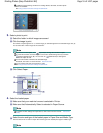
(3)
Use the
or
button (
Scroll Wheel
) to select PC
, and press the
OK
button.
The computer selection screen will appear.
Besides saving scanned data on the computer, you can save them on a memory card or USB flash drive, or
attach them to E-mail on the computer.
For details, refer to the on-screen manual:
Advanced Guide
.
(4)
Select the computer to save or forward scanned data, and press the
OK
button.
Here we select Local (USB).
Note
For the network connection, select the computer name to save or forward scanned data
in the list. If the computer connected over a network is selected, Auto scan does not
appear on the LCD in (5).
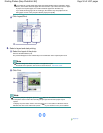
(5)
Select the document type.
Here we select Auto scan.
Note
To select other options for saving or forwarding scanned data, press the left
Function
button to select Save/Forward.
The document types other than Auto scan are Document and Photo.
When Document or Photo is selected for Doc. type, you can save or forward scanned
data to the computer with the settings (scan size, data format, and scan resolution)
specified in Scan settings (the right
Function
button).
See Changing the Settings.
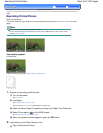
2.
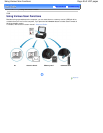
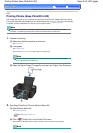
Load an original on the Platen Glass.
See Loading Originals.
For details on the types and sizes of the original which can be scanned, see
Originals You Can Load
.
Note
When Document or Photo is selected for Doc. type, press the right
Function
button to select
Scan settings and select the size of original for Scan size.
See Changing the Settings.
Characters and lines written with a light colored pen or highlight pen may not be scanned
properly.
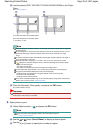
3.
Press the
Color
or
Black
button to start scanning.
MP Navigator EX will be started, and the scanned data will be saved to the computer according to the settings
specified with MP Navigator EX.
Scanning document... will appear while scanning the original.
The machine automatically detects whether the type of a scanned data is photo or document and the scanned
data is saved to a single file on the computer according to the settings specified with MP Navigator EX (JPEG/
Exif, TIFF, PDF).
Page 45 of 1037 pagesSaving Scanned Data to the Computer