


31
E
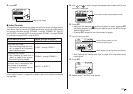
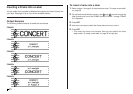
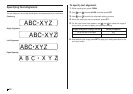
Inputting Text into an AUTO Format
The two AUTO formats automatically adjust the size of characters in accord-
ance with the number of characters you input.
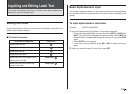
The table below shows how character size is adjusted for each auto format.
To input text into an AUTO format label
1. Perform steps 1 through 4 of the procedure under “To create a new label”
on page 26.
2. On the label format selection screen, use and to scroll through the
label formats until AUTO1 or AUTO2 is displayed.
3. Press SET.
4. Input the text you want.
5. Press SET.
• Now you can perform the other steps under “To create a new label” on page
26 to complete the label.
AUTO 1 (1 line) AUTO 2 (2 lines)
Displayed Size Printed Size Displayed Size Printed Size
0 to 9 ×5 15mm (
5
ÚÚ
ÚÚ
Ú
8
") ×2 6mm (
1
ÚÚ
ÚÚ
Ú
4
")
10 to 12 ×4 12mm (
1
ÚÚ
ÚÚ
Ú
2
") ×2 6mm (
1
ÚÚ
ÚÚ
Ú
4
")
13 to 16 ×3 9mm (
3
ÚÚ
ÚÚ
Ú
8
") ×2 6mm (
1
ÚÚ
ÚÚ
Ú
4
")
17 to 24 ×2 6mm (
1
ÚÚ
ÚÚ
Ú
4
") ×2 6mm (
1
ÚÚ
ÚÚ
Ú
4
")
25 to 49 ×1 3mm (
1
ÚÚ
ÚÚ
Ú
8
") ×1 3mm (
1
ÚÚ
ÚÚ
Ú
8
")
Number of Input
Characters
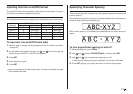
Specifying Character Spacing
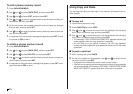
There are two ways that characters can be spaced: proportional spacing and
uniform spacing.
With proportional spacing, the amount of space between two characters de-
pends on what those two characters are.
With uniform spacing, all characters are separated by the same amount of
space.
To turn proportional spacing on and off
1. While inputting text, press FORM.
2. Use and to select PROPORTIONAL, and then press SET.
3. Use and to turn proportional spacing on or off.
• Note that the setting you select is applied to all the text of the label.
4. Press SET to apply your setting and return to the text input screen.