


3-10
PA-2FE-TX and PA-2FE-FX Two-Port Fast Ethernet Port Adapter Installation and Configuration
OL-3474-07
Chapter 3 Removing and Installing Port Adapters
Port Adapter Removal and Installation
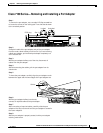
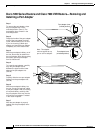
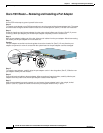
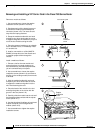
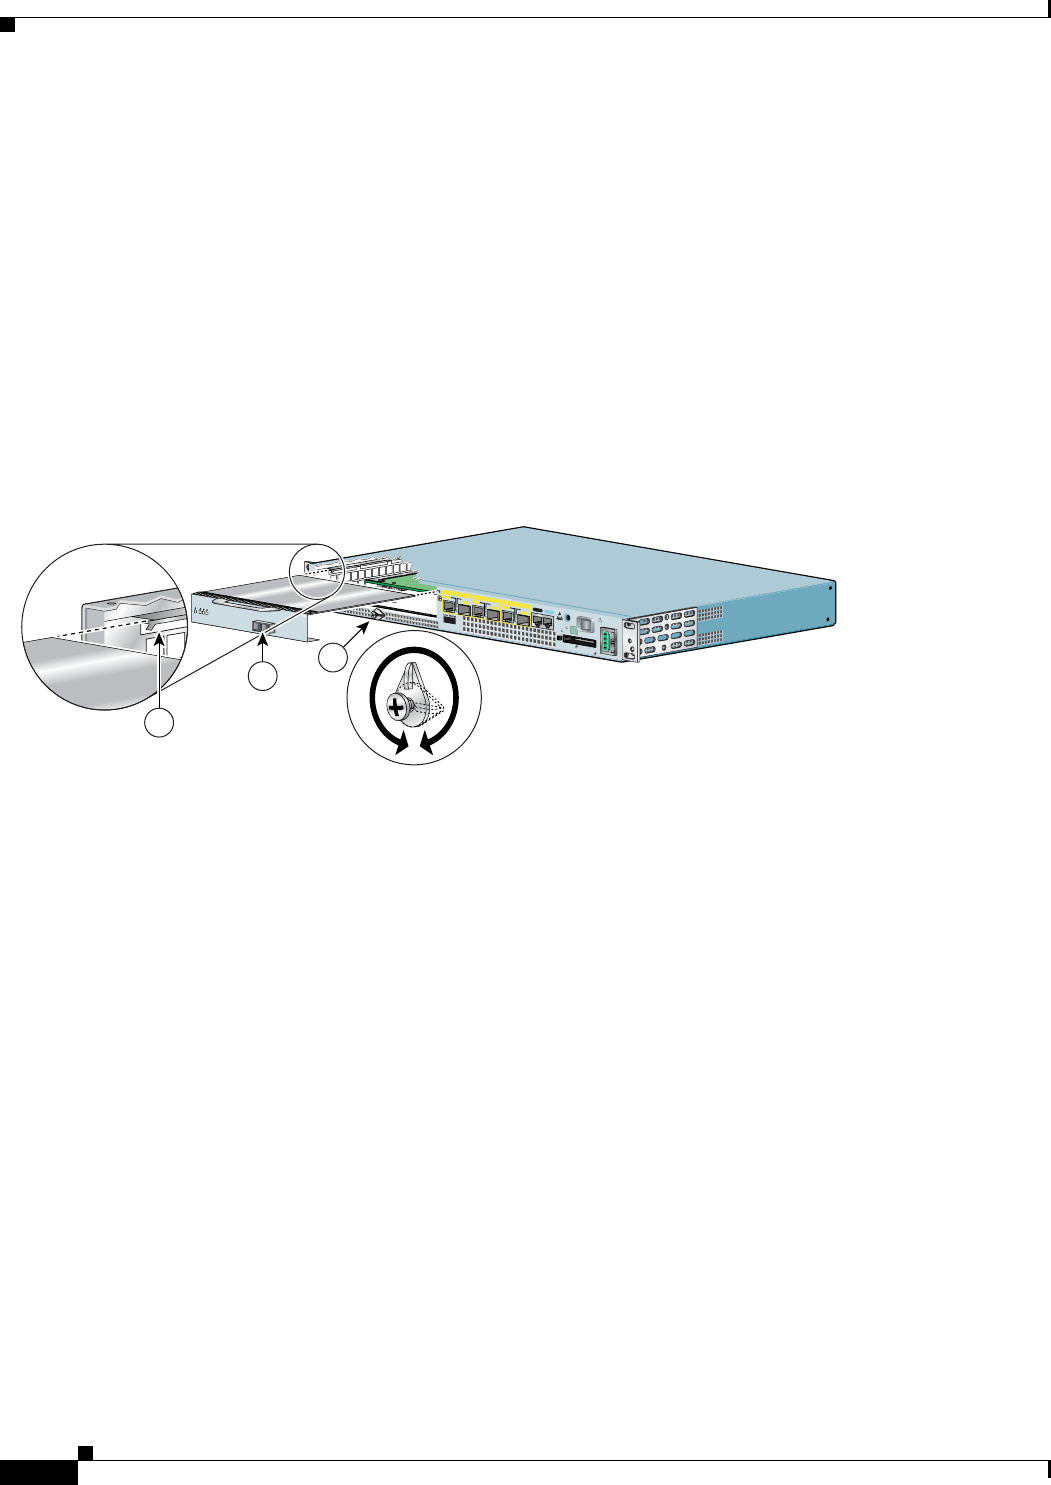
Cisco 7301 Router—Removing and Installing a Port Adapter
84129
A
L
A
R
M
R
J
4
5
E
N
L
IN
K
T
X
R
X
G
B
IC
G
IG
A
B
IT
E
T
H
E
R
N
E
T
0/2
R
J
4
5
E
N
L
IN
K
T
X
R
X
G
B
IC
G
IG
A
B
IT
E
T
H
E
R
N
E
T
0
/0
R
J
4
5
E
N
L
IN
K
T
X
R
X
G
B
IC
G
IG
A
B
IT
E
T
H
E
R
N
E
T
0
/1
C
IS
C
O
7411
S
L
O
T
1
C
O
N
S
O
L
E
A
U
X
C
O
M
P
A
C
T
F
L
A
S
H
S
T
A
T
U
S
1
0
0
-2
4
0
V
, 2
A
, 5
0
/6
0
H
z
2
4
V
=
9
A
, 4
8
- 6
0
V
=
5
A
A
ENABLED
R
X
C
E
L
L
S
R
X
C
A
R
R
IE
R
R
X
A
L
A
R
M
ATM
BA
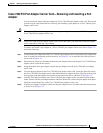
Step 1
Use an ESD wrist strap to ground yourself to the router.
Step 2
To remove a port adapter, use a Phillips screwdriver to turn the screw holding the port adapter latch. The screw
should be loose enough to allow the latch to rotate to an unlocked position. (See A.) The latch can rotate 360˚.
Step 3
Grasp the handle and pull the port adapter from the router, about halfway out of its slot. (See B.) If you are
removing a blank port adapter, pull the blank port adapter completely out of the chassis slot.
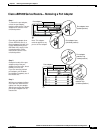
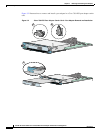
Step 4
With the port adapter halfway out of the slot, diconnect all cables from the port adapter. After disconnecting
the cables, pull the port adapter from its chassis slot.
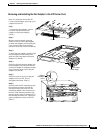
Caution
The port adapter must slide into the slot guides close to the chassis lid. (See C.) Do not allow the port
adapter components to come in contact with the system board or the port adapter could be damaged.
Step 5
To insert the port adapter, carefully align the port adapter carrier in the slot guides. (See C.) Slide the new
port adapter halfway into the chassis.
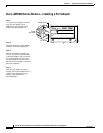
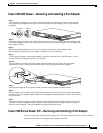
Step 6
Connect all required cables to the port adapter. After connecting all required cables, carefully slide the port
adapter all the way into the slot until the port adapter is seated in the midplane.
Step 7
After the port adapter is properly seated, turn and secure the port adapter latch in the upright, locked
position. (See A.) Tighten the screw to ensure the port adapter remains firmly in place.
B
C