


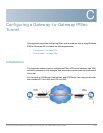


Configuring a Gateway-to-Gateway IPSec Tunnel
Configuring the VPN Settings for the VPN Routers
Cisco WRVS4400N Wireless-N Gigabit Security Router with VPN Administration Guide 205
C
STEP 8 For the Remote Secure Group, select Subnet. Enter VPN Router 2’s local network
settings in the IP Address and Mask fields. Note that the subnet of Router 2 must
be different than the subnet of Router 1.
STEP 9 For the Remote Secure Gateway, select IP Addr. Enter VPN Router 2’s WAN IP
address in the IP Address field.
STEP 10 Click the Save Settings button.
Configuring the VPN Settings for VPN Router 2
Follow similar instructions for configuring VPN Router 2.
STEP 1 Launch the web browser for a networked PC, designated PC 2.
STEP 2 Enter the VPN Router’s local IP address in the Address field (default is
192.168.1.1). Then press Enter.
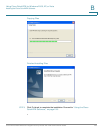
STEP 3 A password request window will appear. (Non-Windows XP users will see a
similar window.) Complete the User Name and Password fields (admin is the
default user name and password). Then click the OK button.
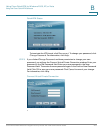
STEP 4 If the LAN IP address is still the default one, change it to 172.168.1.1 and save the
setting.
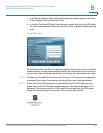
STEP 5 Click VPN > IPSec VPN.
STEP 6 For the VPN Tunnel setting, select Enabled.
STEP 7 Enter a name in the Tunnel Name field.
STEP 8 For the Local Secure Group, select Subnet. Enter VPN Router 2’s local network
settings in the IP Address and Mask fields.
STEP 9 For the Remote Secure Group, select Subnet. Enter VPN Router 1’s local network
settings in the IP Address and Mask fields.
STEP 10 For the Remote Secure Gateway, select IP Addr. Enter VPN Router 1’s WAN IP
address in the IP Address field.
STEP 11 Click the Save Settings button.