Disassembly
2 - 26 Removing the Cardbus Modules
2.Disassembly
Removing the Cardbus Modules
1. Turn the computer OFF, remove the battery (page 2 - 6), the bottom case assembly (page 2 - 19) and the mainboard
(page 2 - 24).
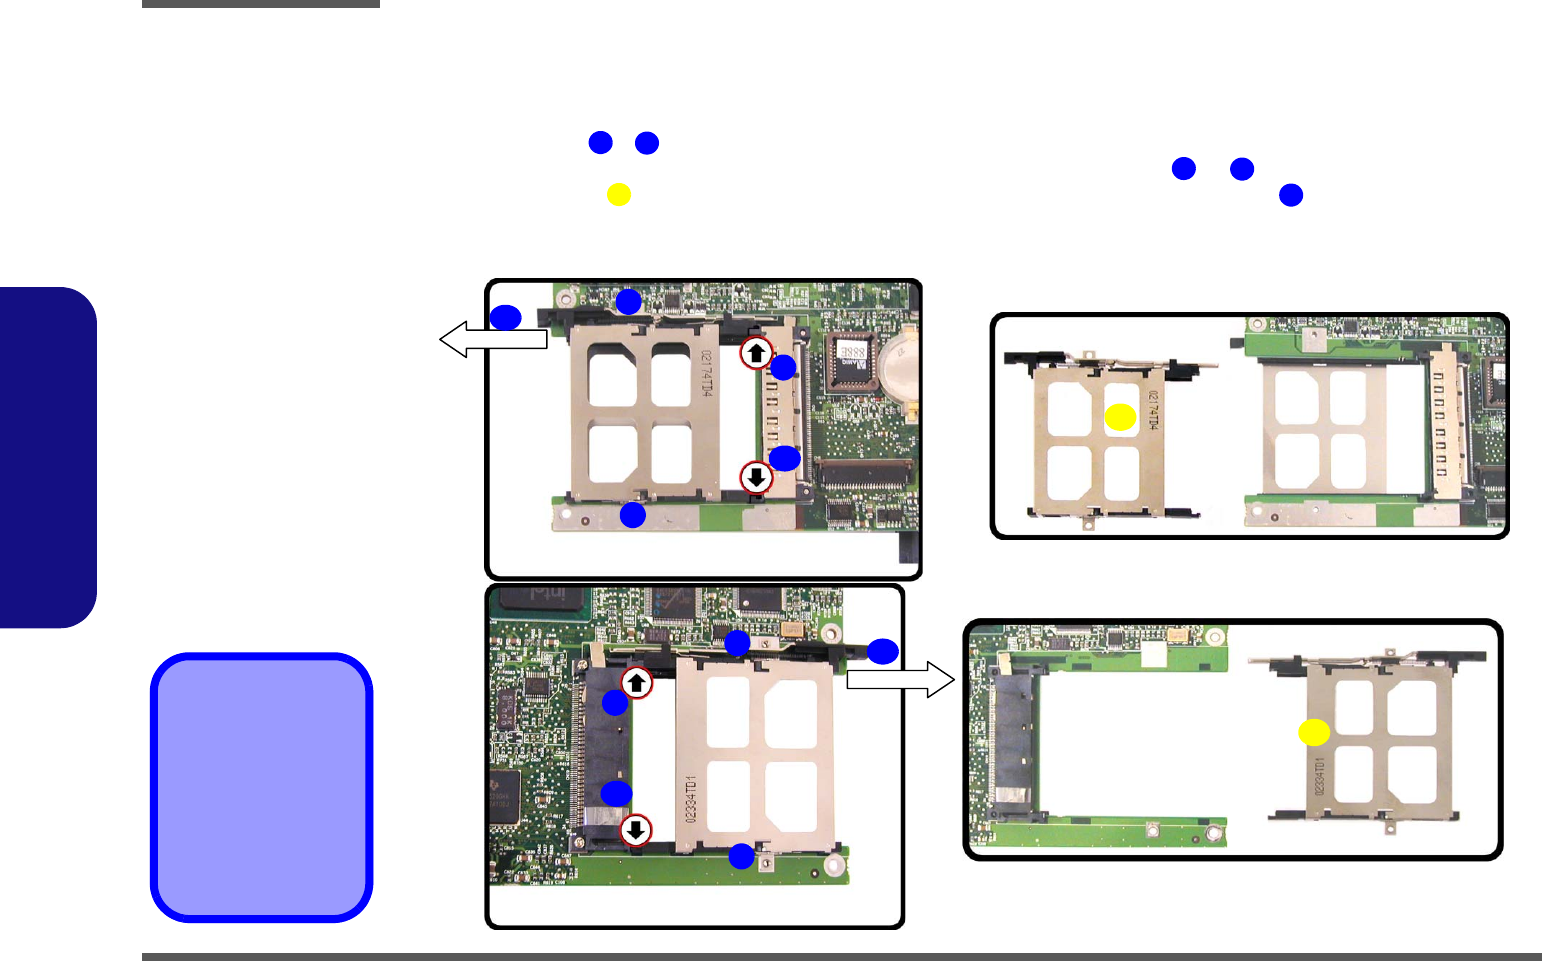
2. Remove screws - (Figure 2 - 22a) on the cardbus assembly.
3. Carefully, but firmly, apply pressure with your thumb and forefinger at point or (Figure 2 - 22a) to ease the
cardbus assembly off the mainboard (it is advantageous to have the eject mechanism in the out position so as
not to interfere with the separation process).
4. Turn the mainboard over and repeat the process for the other side (Figure 2 - 22b).
Figure 2 - 22
Cardbus Modules
Removal
Sequence
a. Remove the screws.
b. Apply pressure at the
illustrated points to
carefully prize the
module off the main-
board.
6. Cardbus module
(top)
7. Cardbus module
(bottom)
•2 Screws
1
2
3
4
6
5
a.
7
2
1
3
4
5
6
3
4
b.
2
1
5


