Disassembly
2 - 30 Removing the LCD
2.Disassembly
Removing the LCD
1. Turn the computer OFF, remove the battery (page 2 - 6), the bottom case assembly (page 2 - 19) and the inverter
board (page 2 - 29).
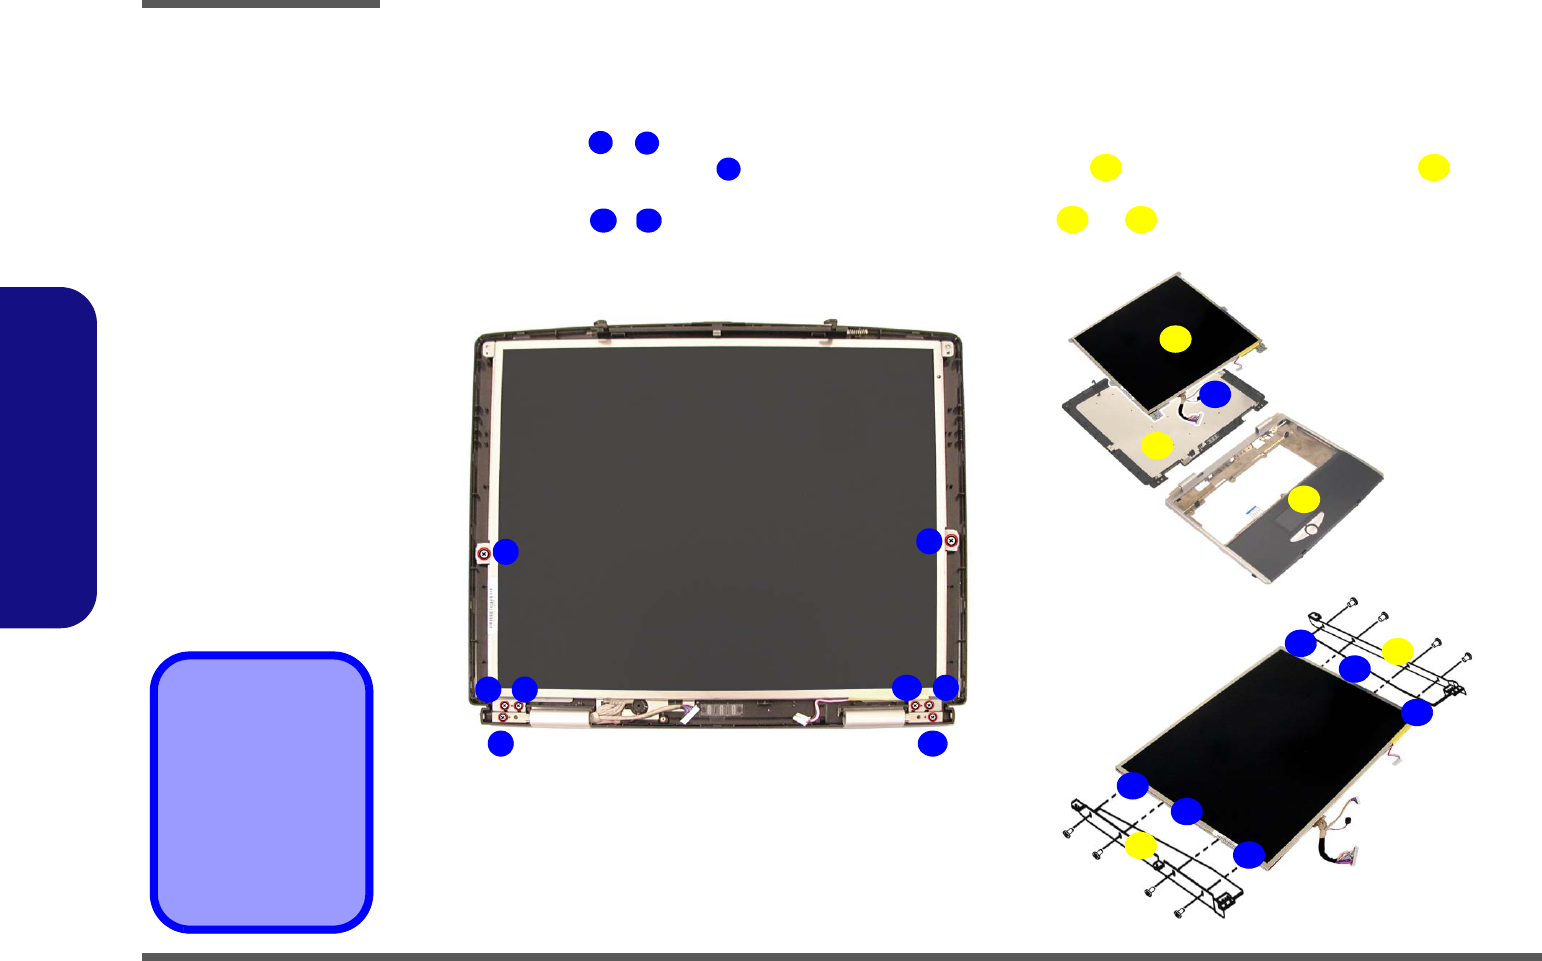
2. Remove screws - (Figure 2 - 26a) from the LCD.
3. Disconnect the cable at point (Figure 2 - 26b), then lift the LCD up off the display back panel and top
case module.
4. Remove screws - (Figure 2 - 26c) from the LCD brackets & , then separate the LCD from the brack-
ets.
Figure 2 - 26
LCD Removal
Sequence
a. Remove the 8 screws
from the LCD.
b. Disconnect the cable
and lift up the LCD.
d. Remove the screws
and separate the
brackets from the
LCD.
10.LCD
11.Display back panel
12.Top case module
19.LCD bracket
20.LCD bracket
•14 Screws
1
8
9
10 11
13 18
19 20
2
1
3
5
7
8
6
a. b.
c.
4
14
15
13
17
18
16
20
19
9
10
11
12


