


52
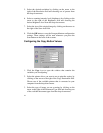
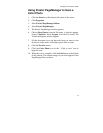
5. Click one of the four icons in the Click to Scan area of the
VistaScan Beginner window. Your selection identifies the type
of image you are about to scan and tells VistaScan how to set
the scanner options for the best results. The image type
selections include: Color photos, Text/line art, Web Images and
Printed Matter settings.
Once you click on the desired image type, the scanner starts
scanning the image using the appropriate settings.
6. When the scan is complete, the image is printed on your printer.
Using VistaScan to Scan a Photo to E-
mail
Scanning an image to e-mail is similar to the procedure described in
the Using VistaScan to Scan and Print Images section earlier in this
guide. Follow steps 1 through 3 as listed in the Scan and Print
instructions, then proceed with the following steps:
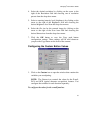
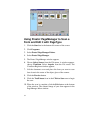
1. Click on the E-mail icon to set the scanner settings to the best
values for scanning an image to e-mail.
NOTE: You may need to adjust the destination preferences in
the VistaScan Beginner window. For information about setting
preferences, refer to Setting the VistaScan Preferences section.
2. Click on the Web Image icon in the “Click to scan” area of the
VistaScan Beginner window. The scanner starts scanning the
image using the appropriate settings for web images.
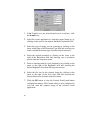
3. After the image is scanned, a Microsoft Exchange or Lotus
cc:Mail e-mail window appears with an icon representing the
scanned image embedded in the message area of the window.
NOTE: For more information about using Microsoft Exchange
or Lotus cc:Mail refer to the user documentation that came with
the application.
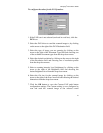
4. Fill out the rest of the standard e-mail information (address,
subject, etc.) as you ordinarily would. Send the e-mail.