


Removing and Replacing Parts 4-43
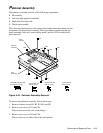
Touch-Pad Assembly
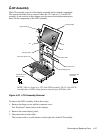
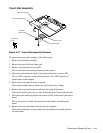
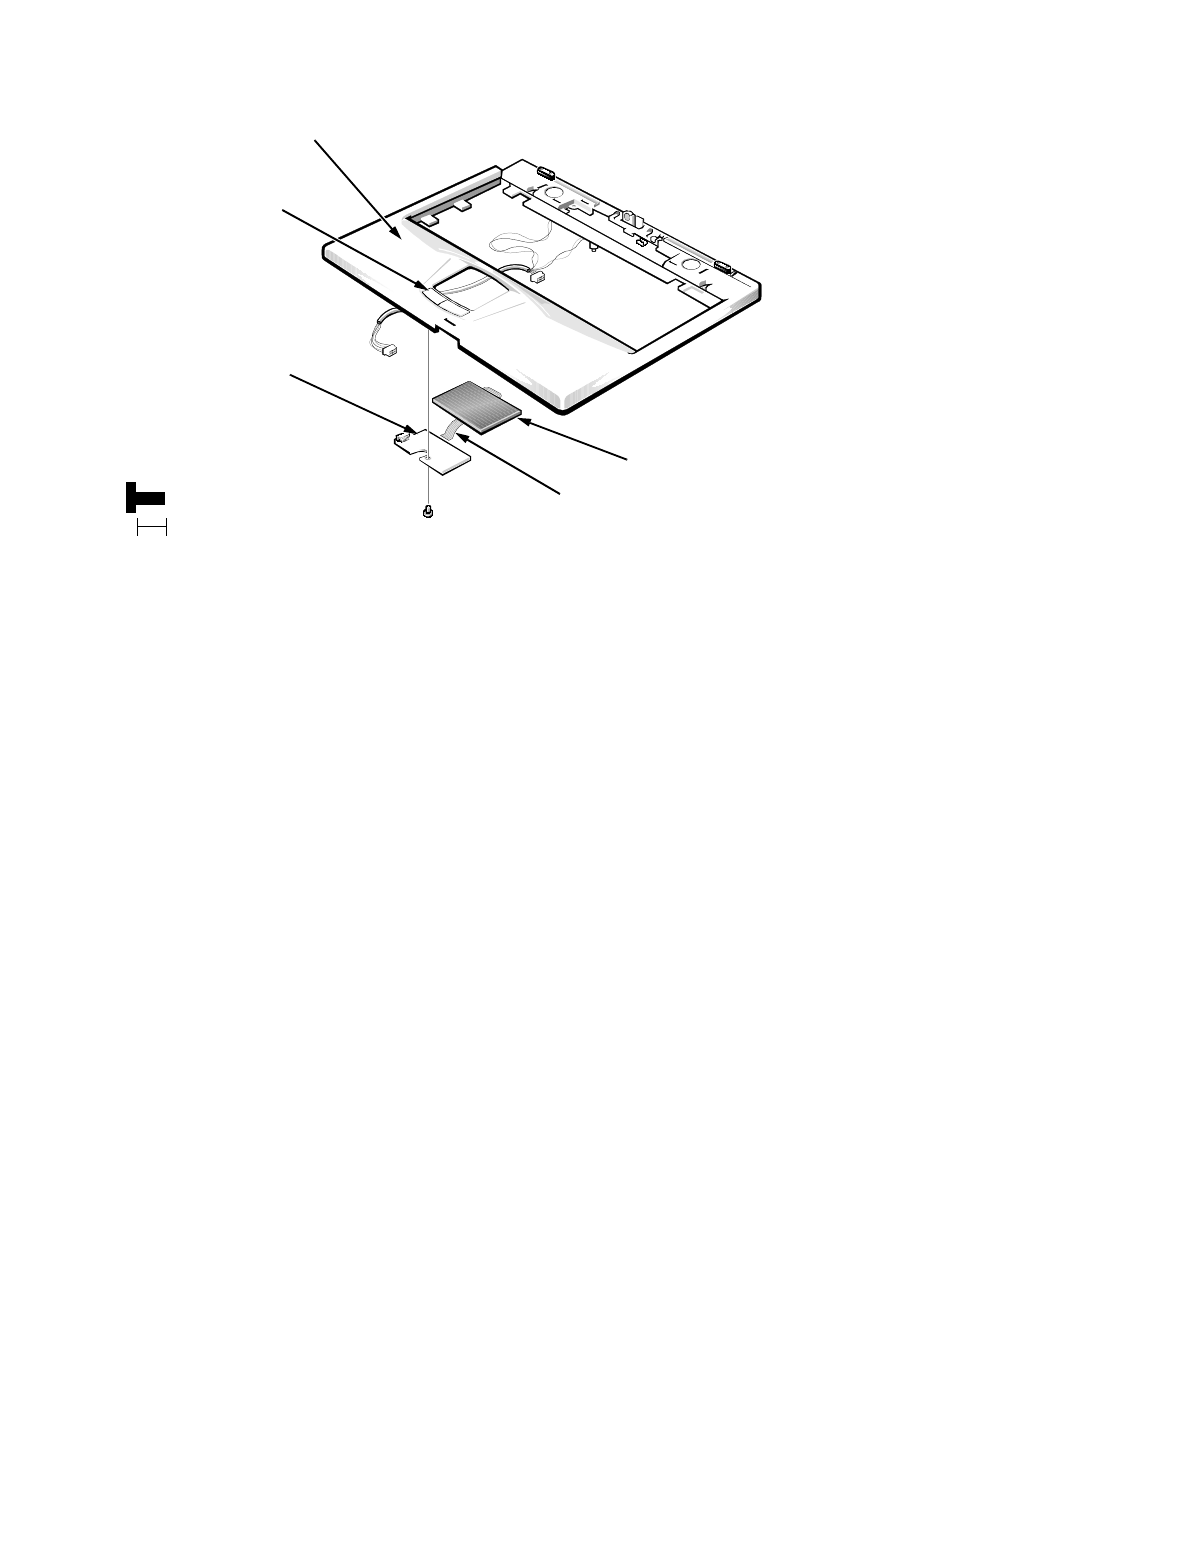
Figure 4-27. Touch-Pad Assembly Removal
To remove the touch-pad assembly, follow these steps:
1. Remove the palmrest assembly.
2. Remove the hard-disk drive heat sink.
3. Remove touch-pad button screw H7.
This screw holds the touch-pad button board in place.
4. Disconnect the touch-pad cable from touch-pad button connector JP1.
This is a ZIF connector on the touch-pad board. See “ZIF Connectors”
found earlier in this chapter.
5. Remove the touch pad from the computer.
The touch pad and touch-pad board are held in place by a flange.
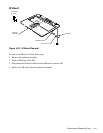
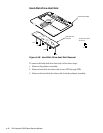
6. Remove the touch-pad button board from the touch-pad buttons.
The board is held in place by two tabs. Rotate the board from under the tabs.
7. Disconnect the touch-pad cable from connector JP2 on the touch-pad button
board.
This is a pressure-fit cable. Reconnect the cable before reinstalling the
board.
8. Remove the touch-pad button board from the computer.
The touch-pad buttons are heat-staked into the palmrest assembly and are
not removable.
(screw H7 is
5 mm)
H7
touch-pad
button board
touch pad
touch-pad cable
palmrest assembly
5 mm
touch-pad buttons (2)