


78 Installing System Components
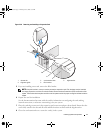
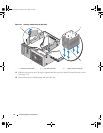
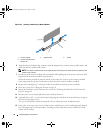
Figure 3-23. Installing and Removing a Memory Module
6
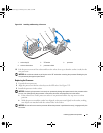
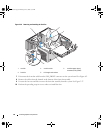
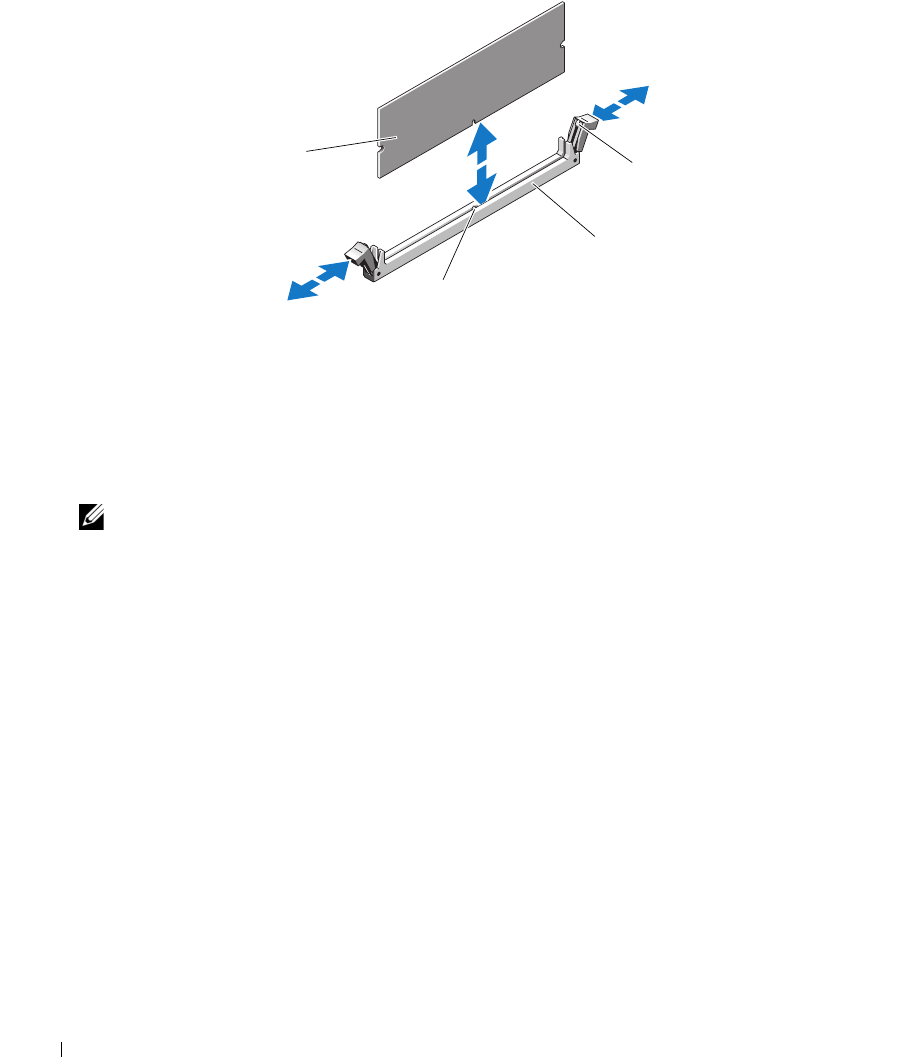
Align the memory module's edge connector with the alignment key on the memory module socket, and
insert the memory module in the socket.
NOTE: The memory module socket has an alignment key that allows you to install the memory module in the
socket in only one way.
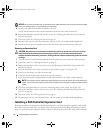
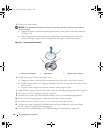
7
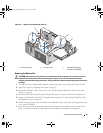
Press down on the memory module with your thumbs while pulling up on the ejectors with your index
fingers to lock the memory module into the socket.
When the memory module is properly seated in the socket, the ejectors on the memory module
socket align with the ejectors on the other sockets that have memory modules installed.
8 Repeat
step 3
through
step 7
of this procedure to install the remaining memory modules.
9 Close the system. See
"Closing the System" on page 43
.
10 Rotate the hard-drive carrier back into the system. See
"Rotating the Hard-Drive Carrier Into the
System" on page 46
.
11
Reconnect the system and peripherals to power and turn them on.
12
(Optional) Press <F2> to enter the System Setup program, and check the System Memory setting on
the main System Setup screen.
The system should have already changed the value to reflect the newly installed memory.
13 If the value is incorrect, one or more of the memory modules may not be installed properly. Repeat
step 2
through
step 12
of this procedure, checking to ensure that the memory modules are firmly
seated in their sockets.
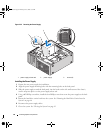
1 memory module 2 alignment key 3 socket
4 memory module socket
ejectors (2)
4
1
3
2
book.book Page 78 Monday, June 5, 2006 1:51 PM