


Installing System Components 93
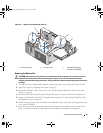
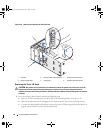
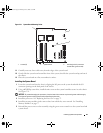
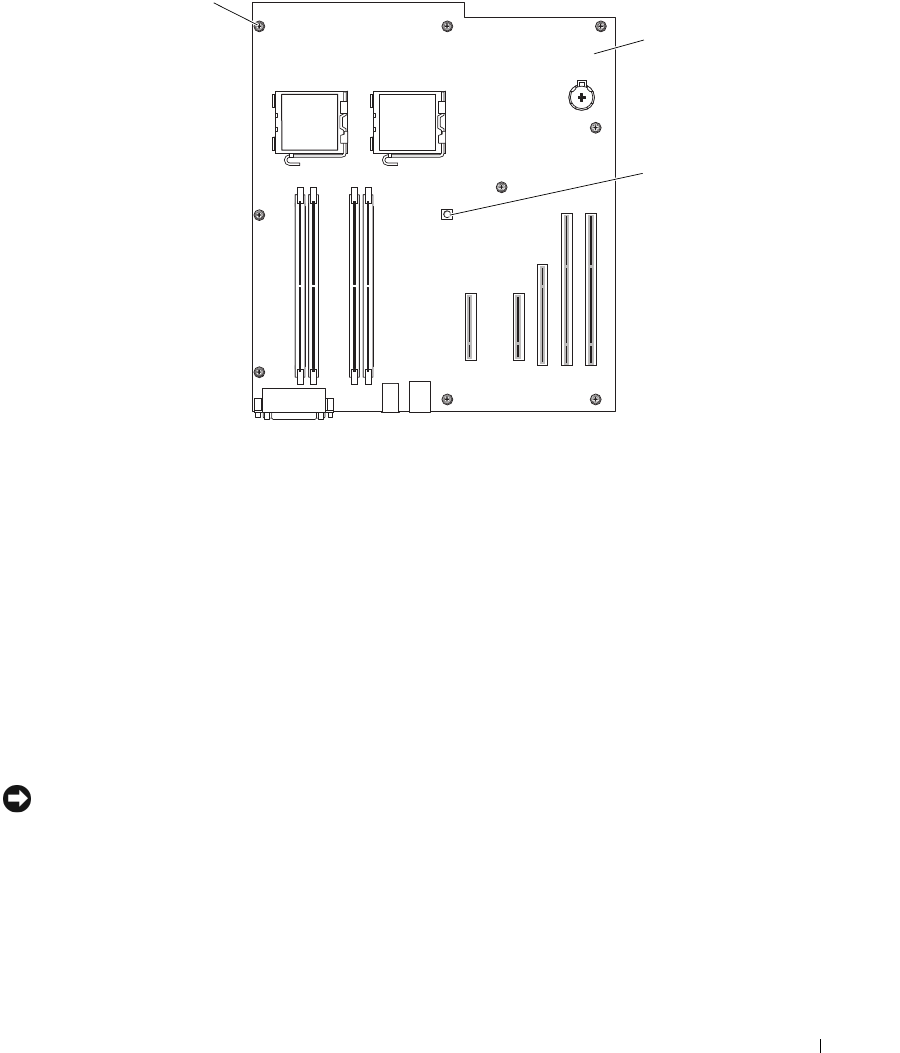
Figure 3-31. System Board Mounting Points
11
Carefully route any loose cables away from the edges of the system board.
12
Gently slide the system board toward the front of the system, then lift the system board up and out of
the chassis.
13
Place the system board on a flat, nonconductive surface.
Installing the System Board
1
Lower the system board into the chassis, aligning the I/O ports on the system board with the I/O
connector openings on the back panel of the chassis.
2
Using a #2 Phillips screwdriver, install the nine screws on the system board that secure it to the chassis.
See Figure 3-31.
NOTICE: To prevent damaging the processor, clean the heat sink to remove any thermal grease and then apply
fresh thermal grease to the processor before installing the heat sink.
3
Install the processors. See "Replacing the Processor" on page 75.
4
Install the memory modules in the same sockets from which they were removed. See "Installing
Memory Modules" on page 77.
5
Reinstall the processor access door assembly, using the green screw to attach it to the system board and
system chassis.
1 screws (9) 2 system board 3 mounting hole for processor
access door (green screw)
1
2
3
book.book Page 93 Monday, June 5, 2006 1:51 PM