


Printing with Special Layout Options 56
❏ Text & Image for higher quality pages with text and images
❏ Graphic for higher quality graphics
❏ Photo for good quality and speed
3. Select the paper source as the Source setting.
4. Select Plain Paper/Bright White Paper as the Type setting.
& See “Selecting the Correct Paper Type or Media Type” on page 28.
5. Select the appropriate Size setting.
6. Select Portrait (tall) or Landscape (wide) to change the orientation of your printout.
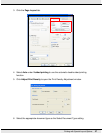
7. Select 2-sided printing, Auto.
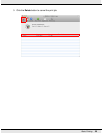
8. Click OK to save your settings.
9. Click OK or Print to start printing.
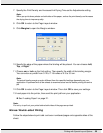
Note:
Do not try to pull out your prints before both sides of the page are printed.
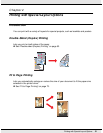
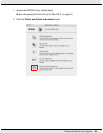
Special Settings for Automatic Double-sided Printing (Using the Duplex
Unit)
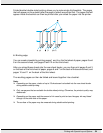
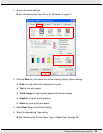
When you print photos or heavy text on both sides of the page, you can adjust the print
density and drying time to prevent ink from bleeding through to the other side. You can also
adjust the margins to allow for binding your pages.
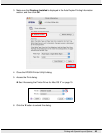
Note:
Automatic double-sided printing supports plain paper and Epson Bright White Paper only.
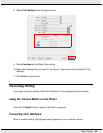
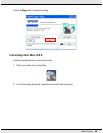
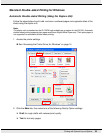
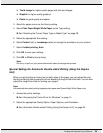
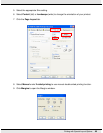
1. Access the printer settings.
& See “Accessing the Printer Driver for Windows” on page 14.
2. Select the appropriate Quality Option, Paper Options, and Orientation.
& See “Automatic Double-sided Printing (Using the Duplex Unit)” on page 55.