


Paper Handling 21
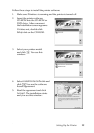
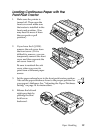
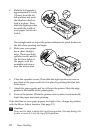
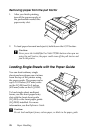
10. Attach the front cover with
the continuous paper
positioned as shown.
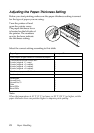
11. Make sure the paper guide is
lying flat on the printer and
slide the edge guides to the
middle of the paper guide.
12. Turn on the printer. When the printer receives data, it automatically
loads the paper and starts printing.
If the first line on your page appears too high or low, you can change its
position using the Micro Adjust function as described on page 33.
Additionally, when using the push tractor, it is a good idea to set the
Auto tear-off function in the Default Setting mode to On. See page 38
for more information.
c
Caution:
Never use the knob to adjust the top-of-form position; this may damage the
printer or cause it to lose the top-of-form position.
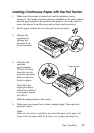
Loading Continuous Paper with the
Rear Push Tractor
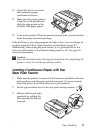
1. Make sure the printer is turned off, the tractor is installed in the rear
push position, and the paper guide is removed. (You may need to
move the tractor from the front push or pull position.)
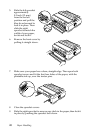
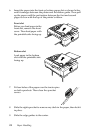
2. Set the paper release lever to the rear push tractor position.
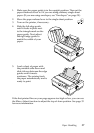
3. Release the left and right
sprockets by pulling the
blue sprocket lock levers
forward.