


22 Paper Handling
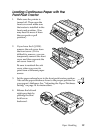
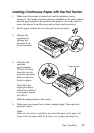
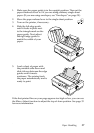
4. Slide the left sprocket
approximately 0.5 inch
(12 mm) from the far
left position and push
the blue lever back to
lock it in place. Then
slide the right sprocket
to match the width of
your paper, but do not
lock it.
The triangle mark on top of the printer indicates the point furthest to
the left where printing can begin.
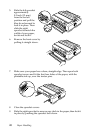
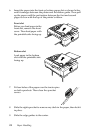
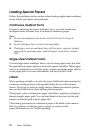
5. Make sure your paper
has a clean, straight
edge. Then open both
sprocket covers and fit
the first four holes of
the paper, with the
printable side down,
over the tractor pins.
6. Close the sprocket covers. Then slide the right sprocket to remove
any slack in the paper and lock it in place by pushing the blue lock
lever down.
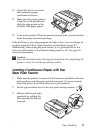
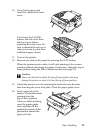
7. Attach the paper guide and lay it flat on the printer. Slide the edge
guides to the middle of the paper guide.
8. Turn on the printer. When the printer receives data, it automatically
loads the paper and starts printing.
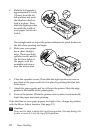
If the first line on your page appears too high or low, change its position
with the Micro Adjust function. (See page 33.)
c
Caution:
Never use the knob to adjust the top-of-form position; this may damage the
printer or cause it to lose the top-of-form position.