


Basic Operations 119
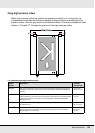
Head Alignment
You can perform the following three types of adjustments from this menu.
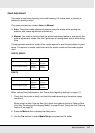
❏ Standard (Auto): The printer reads adjustment patterns using the sensor while printing
the patterns, and makes adjustments automatically.
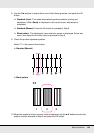
❏ Standard (Manual): Visually check the printed adjustment patterns, and specify the
optimal adjustment values. Use this if graininess or misalignment occurs when using
Standard (Auto).
❏ Block pattern: Visually check the printed adjustment patterns, and specify the optimal
adjustment values. Use this if graininess or misalignment occurs when using Standard
(Manual).
Perform Manual(Uni-D) first and then Manual(Bi-D). For S70675 and S50675, you
should perform Manual(Dual Head).
When making Feed Adjustments, see “Precautions regarding settings” on page 111.
1. Check that the printer is ready, and load the media according to the actual usage
conditions.
When using the Auto Take-up Reel Unit, attach the media to the Auto Take-up Reel
Unit. See “Loading and Exchanging Media” on page 38 and “Using the Auto Take-up
Reel Unit” on page 92.
2. Press the Menu button to display the setup menu.
3. Use the d/u buttons to select Media Setup, and press the Z button.
4. Use the d/u buttons to select Customize Settings and press the Z button.
5. Use the d/u buttons to select the media number targeted for adjustment, and press the
Z button.
If a number with existing settings is selected, the existing settings are overwritten.
6. Use the d/u buttons to select Media Adjust, and press the Z button.
7. Use the d/u buttons to select Head Alignment and press the Z button.
If RIP Settings is selected, enter the thickness of the media to be used, and press the
Z button.