


EPSON AcuLaser C1100 Revision B
DISASSEMBLY AND ASSEMBLY DUPLEX 416
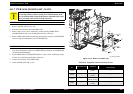
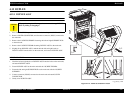
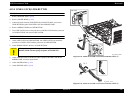
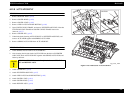
4.12.5 LINK-LATCH, LINK-BUTTON
REMOVAL
1. Remove DUPLEX ASSY. (p.412)
2. Remove COVER-R DUP. (p.413)
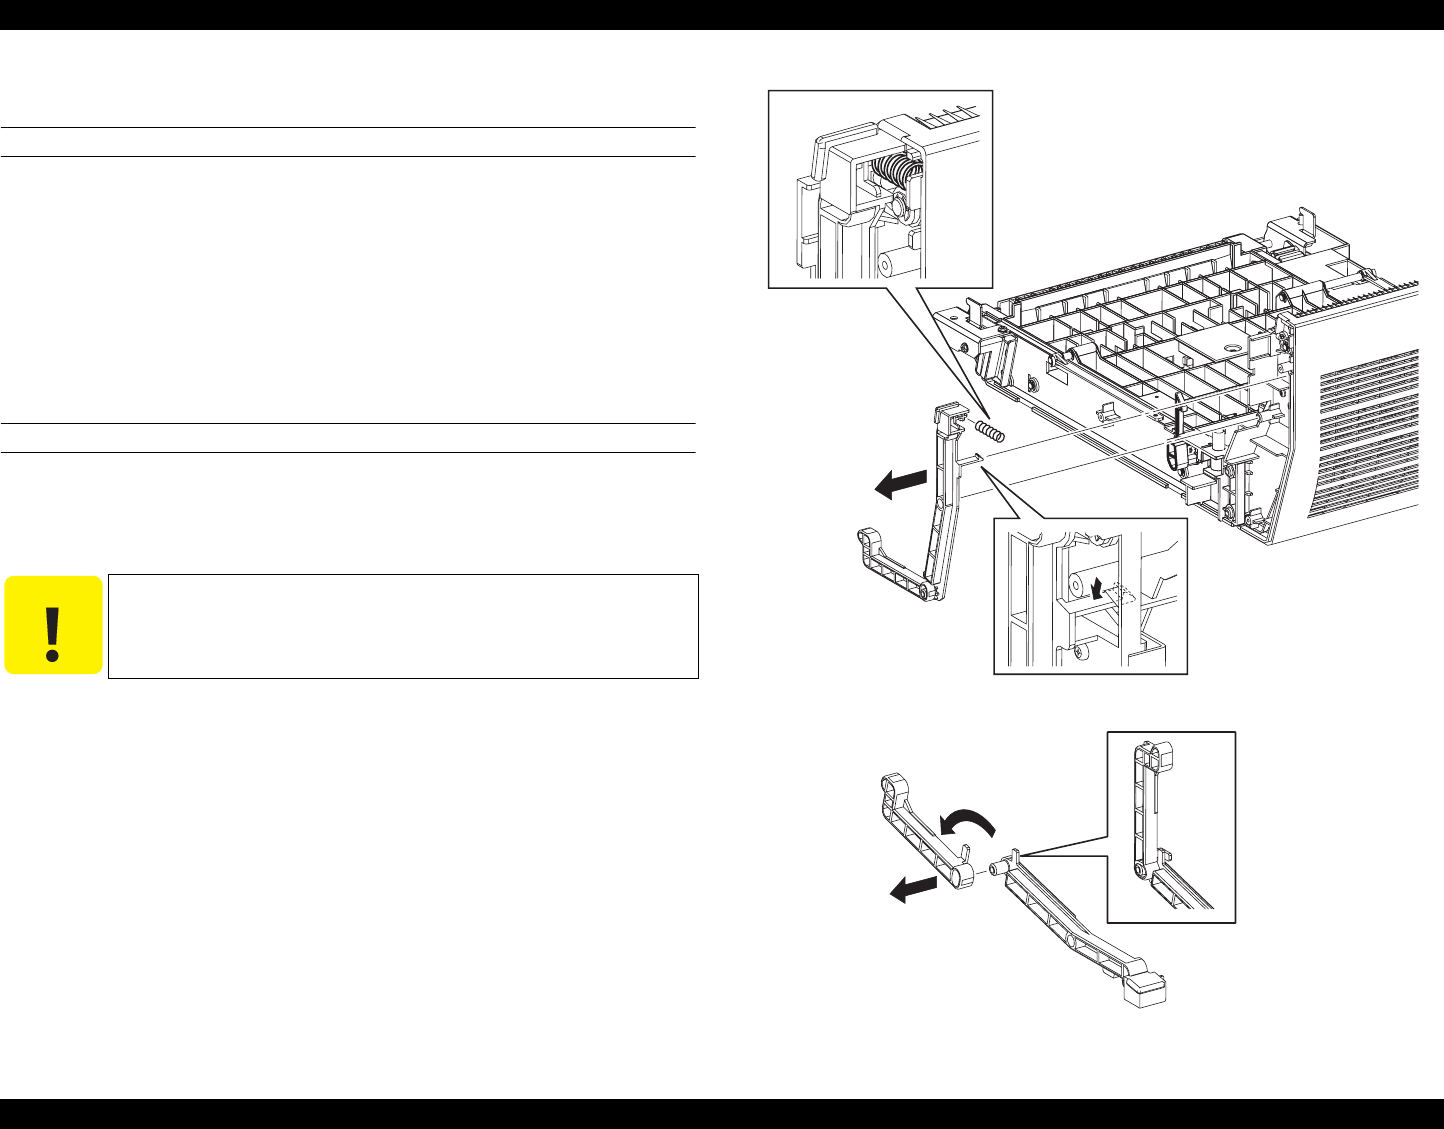
3. Unhook the hook fastening LINK-BUTTON to DUPLEX ASSY, and remove
LINK-BUTTON together with LINK-LATCH and SPRING-LINK.
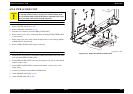
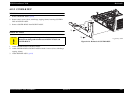
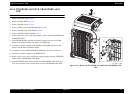
4. Remove SPRING-LINK from LINK-BUTTON.
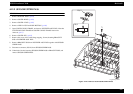
5. Turn LINK-LATCH, remove the protrusion on LINK-LATCH from the protrusion
on LINK-BUTTON, and remove LINK-LATCH.
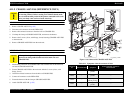
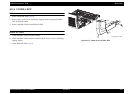
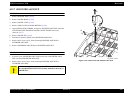
REINSTALLATION
1. Attach LINK-LATCH to LINK-BUTTON, turn LINK-LATCH, and match the
protrusion on LINK-LATCH with the protrusion on LINK-BUTTON.
2. Attach SPRING-LINK to the boss on LINK-BUTTON.
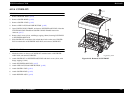
3. Attach LINK-BUTTON to DUPLEX ASSY together with LINK-LATCH and
SPRING-LINK, and fasten by the hooks.
4. Attach COVER-R DUP. (p.413)
5. Attach DUPLEX ASSY. (p.412)
Figure 4-119. Removal of LINK-LATCH and LINK-BUTTON (1)
Figure 4-120. Removal of LINK-LATCH and LINK-BUTTON (2)
C A U T I O N
When performing the following work, make sure to match
SPRING-LINK with the spring receptacle on FRAME-INV.
Leg_Sec03_120FA
CAUTION
4)
3)-2
3)-1
Leg_Sec03_121FA
5)-2
5)-1